Time-travel debugging for Pinia, Vue's official state management library.
What is Colada?
Time-travel debugging for Pinia🍍, Vue’s official state management library
Colada offers a suite of tools for Vue developers working with the Pinia state management library:
- Chrome DevTool Extension
- NPM package that serves as a plugin for the Vue.js DevTools Chrome Extension
- Pinia🍍 plugin to directly access and mutate your app’s store
Core Features
- ✅ Minimal installation and automatic detection of Vue app in Vue.js DevTools
- 🔄 Direct integration into Vue.js DevTools, so developers can use Colada without leaving their existing devtool configuration
- 🕰️ Time travel debugging
- 🔎 Inspector panel for viewing Pinia state within your Vue app
- 💻 A Chrome DevTool Extension providing enhanced features, including:
- 🕰️ Time travel debugging
- 🔎 Inspector panel for viewing Pinia state within your Vue app
Getting Started
Installation: Vue DevTools Plugin
- Ensure the Vue.js DevTools Chrome Extension is installed
- Install the Colada npm package in your app’s root directory
npm install colada-plugin --save-dev
- Add Colada to your Vue app
// main.js

import { createApp } from 'vue';
import { createPinia } from 'pinia';
// import Colada Plugin
import Colada, { PiniaColadaPlugin } from 'colada-plugin';
import App from './App.vue';

const app = createApp(App);
const pinia = createPinia();

app.use(pinia);
pinia.use(PiniaColadaPlugin);
app.use(Colada);

app.mount('#app');
Installation: Chrome DevTools Extension
NOTE: Ensure the Vue.js DevTools Chrome Extension is installed before installing the Colada DevTool Chrome Extension
There are two ways to install the Colada Chrome Extension:
1. Install from the Chrome Web Store
- Navigate to Colada on the Chrome Web Store, and click “Add to Chrome”
2. Install from source
- Clone this repository
- Run the following commands
cd colada-extension
npm install
npm run build
- This will create a new
/distdirectory in/colada-extension - In Chrome, navigate to chrome://extensions.
- In the top right of the Extensions page, there is a toggle for “Developer Mode.” Make sure this is toggled ON.
- On the top left of the page, select “Load Unpacked”, and select the
colada/colada-extension/distdirectory.
How to Use Colada
Using the Colada Vue DevTools Plugin
- Navigate to the Vue.js DevTools
Time Travel Debugging
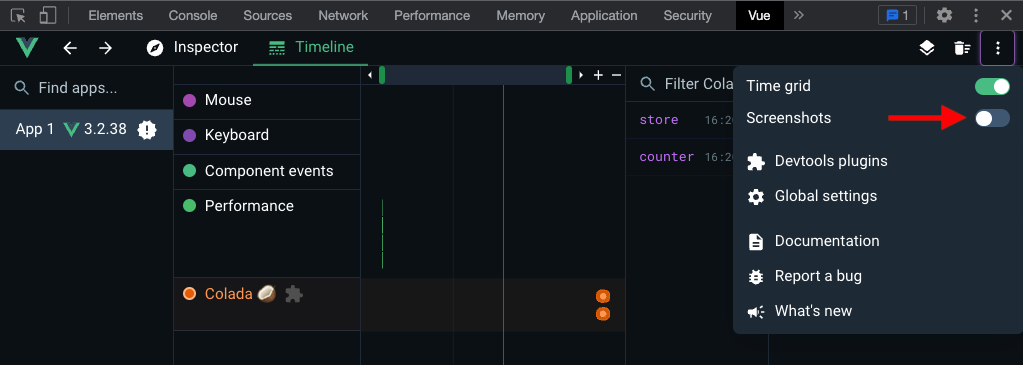
- Select the “Colada” timeline in the timeline view
- Turn off screenshots

- Changes in your app’s store and state will automatically be tracked on the timeline
- Click on timeline events to travel through time and update your app’s state
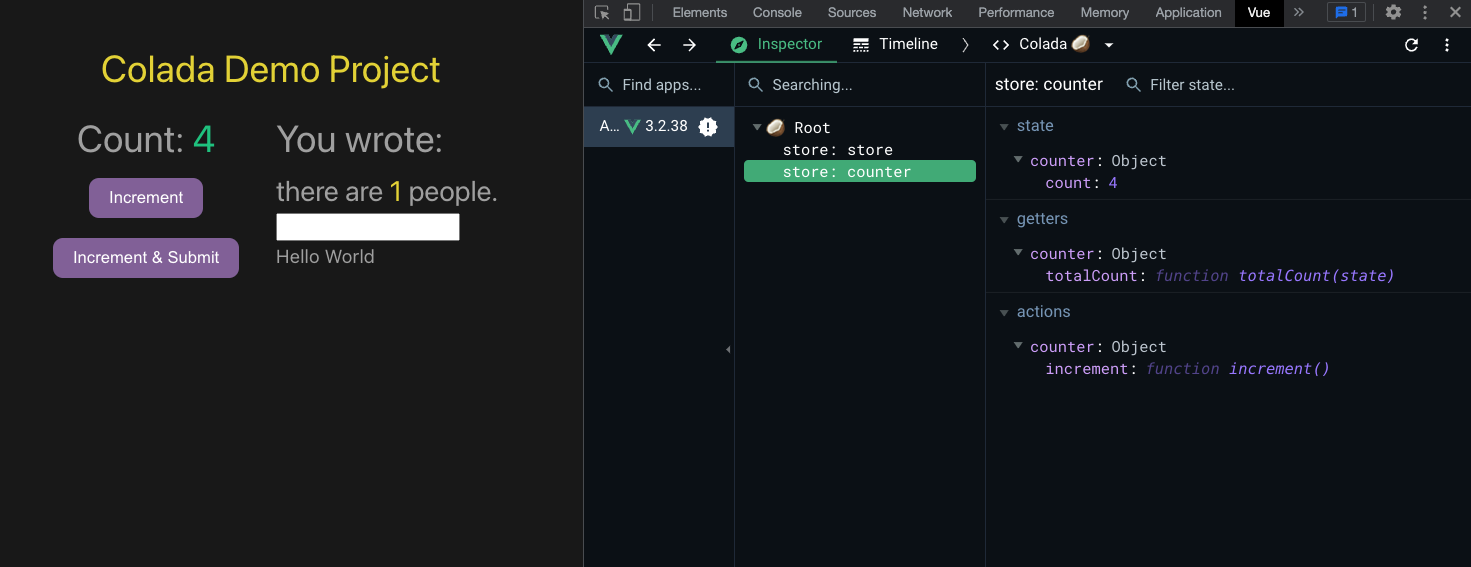
Inspector Panel - View Your App’s Stores and State in Real Time
- Select “Colada” in the component menu drop down
- Click on your Pinia store to view state, actions, and getters updated in real time

Using the Colada Chrome DevTool Extension
-
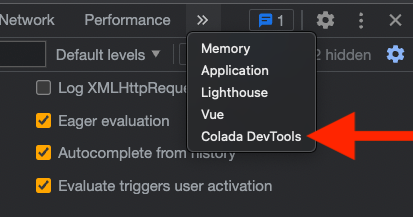
Navigate to Colada DevTools in Chrome

-
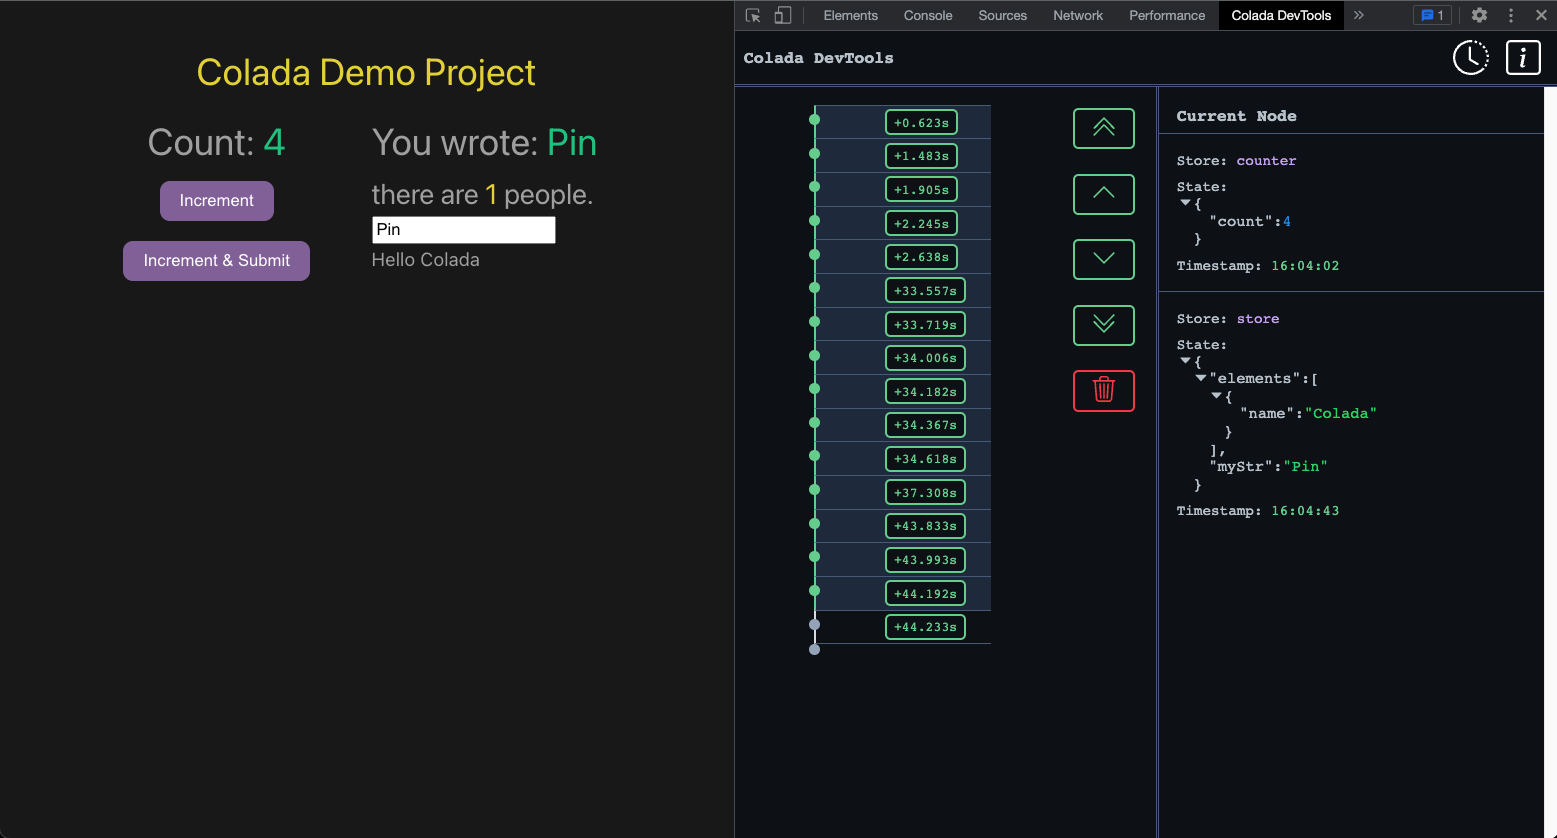
Changes in your app’s store and state will automatically be tracked on the timeline
-
Click on a timestamp or use the arrows to travel through time and update your app’s state
-
View your app’s state as you time travel in the inspector panel on the right

How to Give Colada a Test Run With Our Demo App
- Clone this repository
- Navigate to the
demo-projectdirectory
cd demo-project
- Install packages and run application
npm install
npm run dev
- Interact with the app to watch the app’s state update in real-time!
Contributing and Issues
Interested in conributing to Colada? Reach out to our core team
Feature requests or issues/bugs to report? Let us know!
Release Notes
Contributors
- Parker Steinberg • LinkedIn • Github
- Jonathan Chen • LinkedIn • Github
- Vaughn Sulit • LinkedIn • Github
- Dan Steinbrook • LinkedIn • Github
0.1.1 | Initial release of Colada, more to come!

