CoreUI Free Vue Laravel Bootstrap Admin Template https://coreui.io/
CoreUI Free Vue Laravel Bootstrap Admin Template 
![]()
Curious why I decided to create CoreUI? Please read this article: Jack of all trades, master of none. Why Bootstrap Admin Templates suck.
CoreUI offers 6 versions: Bootstrap, Angular, Laravel, React.js, Vue.js, and Vue.js + Laravel.
CoreUI is meant to be the UX game changer. Pure & transparent code is devoid of redundant components, so the app is light enough to offer ultimate user experience. This means mobile devices also, where the navigation is just as easy and intuitive as on a desktop or laptop. The CoreUI Layout API lets you customize your project for almost any device – be it Mobile, Web or WebApp – CoreUI covers them all!
Table of Contents
- Versions
- CoreUI Pro
- Admin Templates built on top of CoreUI Pro
- Installation
- Usage
- Features
- Creators
- Community
- Community Projects
- License
- Support CoreUI Development
Versions
CoreUI is built on top of Bootstrap 4 and supports popular frameworks.
- CoreUI Free Bootstrap Admin Template
- CoreUI Free Angular Admin Template
- CoreUI Free Laravel Admin Template
- CoreUI Free React.js Admin Template
- CoreUI Free Vue.js Admin Template
- CoreUI Free Vue.js + Laravel Admin Template
CoreUI Pro
- 💪 CoreUI Pro Bootstrap Admin Template
- 💪 CoreUI Pro Angular Admin Template
- 💪 CoreUI Pro Laravel Admin Template
- 💪 CoreUI Pro React Admin Template
- 💪 CoreUI Pro Vue Admin Template
- 💪 CoreUI Pro Vue + Laravel Admin Template
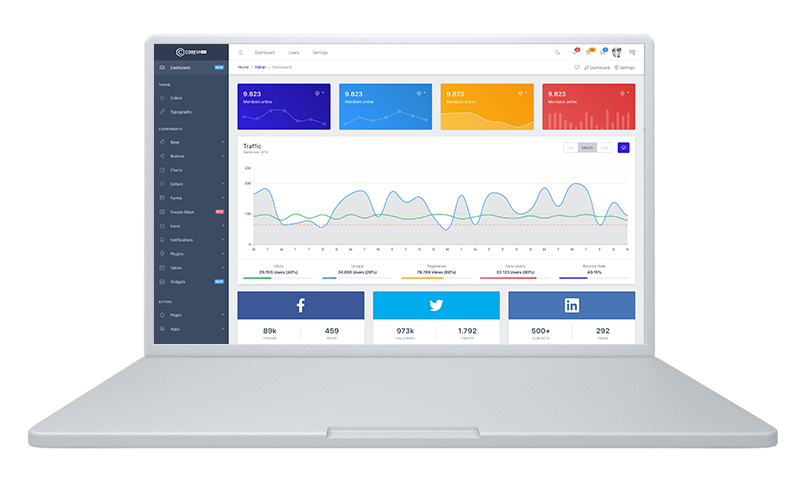
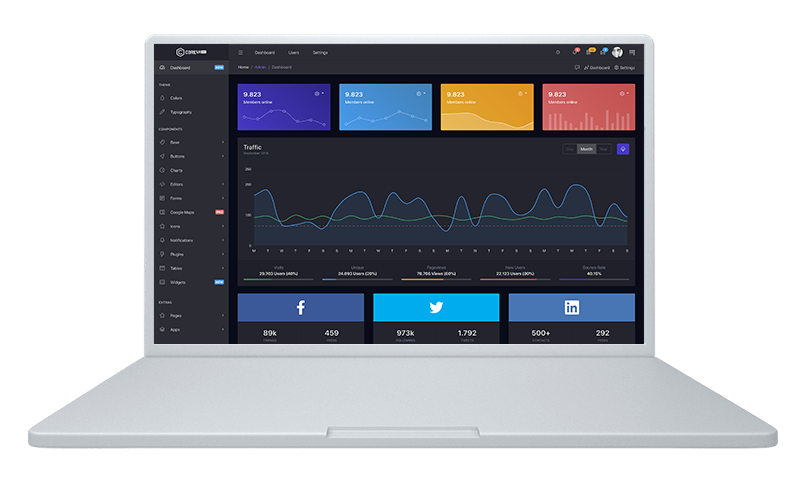
Admin Templates built on top of CoreUI Pro
| Default Theme | Legacy Theme | Dark Layout |
|---|---|---|
 |
 |
 |
Installation
# clone the repo
$ git clone https://github.com/coreui/coreui-free-vue-laravel-admin-template.git my-project

# go into app's directory
$ cd my-project/laravel

# install app's dependencies
$ composer install

# install app's dependencies
$ npm install
If you choose SQLite
# create database
$ touch database/database.sqlite
Copy file “.env.example”, and change its name to “.env”.
Then in file “.env” replace this database configuration:
- DB_CONNECTION=mysql
- DB_HOST=127.0.0.1
- DB_PORT=3306
- DB_DATABASE=laravel
- DB_USERNAME=root
- DB_PASSWORD=
To this:
DB_CONNECTION=sqlite
DB_DATABASE=/path_to_your_project/database/database.sqlite
If you choose PostgreSQL
-
Install PostgreSQL
-
Create user
$ sudo -u postgres createuser --interactive
enter name of role to add: laravel
shall the new role be a superuser (y/n) n
shall the new role be allowed to create database (y/n) n
shall the new role be allowed to create more new roles (y/n) n
- Set user password
$ sudo -u postgres psql
postgres= ALTER USER laravel WITH ENCRYPTED PASSWORD 'password';
postgres= \q
- Create database
$ sudo -u postgres createdb laravel
- Copy file “.env.example”, and change its name to “.env”.
Then in file “.env” replace this database configuration:
- DB_CONNECTION=mysql
- DB_HOST=127.0.0.1
- DB_PORT=3306
- DB_DATABASE=laravel
- DB_USERNAME=root
- DB_PASSWORD=
To this:
DB_CONNECTION=pgsql
DB_HOST=127.0.0.1
DB_PORT=5432
DB_DATABASE=laravel
DB_USERNAME=laravel
DB_PASSWORD=password
If you choose MySQL
- Install MySQL
- Create database (this way or another)
$ mysql -uroot -p
mysql> create database laravel;
Create a user with privileges to the laravel database (root user may not work while it requires a sudo)
- Update .env file
Copy file “.env.example”, and change its name to “.env”.
Then in file “.env” complete database configuration:
DB_CONNECTION=mysql
DB_HOST=127.0.0.1
DB_PORT=3306
DB_DATABASE=laravel
DB_USERNAME=root
DB_PASSWORD=
Next step
# in your app directory
# generate laravel APP_KEY
$ php artisan key:generate

# generate jwt secret
$ php artisan jwt:secret

# run database migration and seed
$ php artisan migrate:refresh --seed
# go to coreui directory
$ cd ../coreui

# install app's dependencies
$ npm install
Usage
Test
# test
$ php vendor/bin/phpunit
If you need separate backend and frontend
# back to laravel directory
$ cd ../laravel

# start local server
$ php artisan serve

$ cd ../coreui

$ npm run serve
Open your browser with address: localhost:8080
If you need change backend adress go to file /coreui/src/main.js
And change line:
Vue.prototype.$apiAdress = 'http://127.0.0.1:8000'
If you don’t need separate backend and frontend
- Go to file /laravel/routes/web.php
And uncomment this lines:
Route::get('/{any}', function () {
    return view('coreui.homepage');
})->where('any', '.*');
- Go to file /laravel/config/filesystems.php
And change this line:
'root' => public_path() . '/../../coreui/public/public',
To this:
'root' => public_path('public'),
- Go to file /coreui/src/views/media/Media.vue
And change this line:
changePort: 'localhost:8080',
To this:
changePort: 'localhost:8000',
# back to laravel directory
$ cd ../laravel

# generate mixing
$ npm run dev

# and repeat generate mixing
$ npm run dev

# start local server
$ php artisan serve
Open your browser with address: localhost:8000
When you have project open in browser
Click “Login” on sidebar menu and log in with credentials:
- E-mail: [email protected]
- Password: password
This user has roles: user and admin
How to add a link to the sidebar:
Instructions for CoreUI Free Vue Laravel admin template only. Pro version have separate instruction.
To add a link to the sidebar - modify seeds file:
my-project/database/seeds/MenusTableSeeder.php
In run() function - add insertLink():
$id = $this->insertLink( $rolesString, $visibleName, $href, $iconString);
$rolesString- a string with list of user roles this menu element will be available, ex."guest,user,admin"$visibleName- a string caption visible in sidebar$href- a href, ex./homepageorhttp://example.com$iconString- a string containing valid CoreUI Icon name (kebab-case), ex.cil-speedometerorcil-pencil
To add a title to the sidebar - use function insertTitle():
$id = $this->insertTitle( $rolesString, $title );
$rolesString- a string with list of user roles this menu element will be available, ex."guest,user,admin"$title- a string caption visible in sidebar
To add a dropdown menu to the sidebar - use function beginDropdown():
$id = $this->beginDropdown( $rolesString, $visibleName, $href, $iconString);
$rolesString- a string with list of user roles this menu element will be available, ex."guest,user,admin"$visibleName- a string caption visible in sidebar$href- a href, ex./homepageorhttp://example.com$iconString- a string containing valid CoreUI icon name (kebab-case). For example:cil-speedometerorcil-pencil
To end dropdown section - use function endDropdown().
To add link to dropdown call function insertLink() between function calls beginDropdown() and endDropdown().
Example:
$id = $this->beginDropdown('guest,user,admin', 'Some dropdown', 'http://example.com', 'cil-puzzle');
$id = $this->insertLink('guest,user,admin', 'Dropdown name', 'http://example.com');
$this->endDropdown();
IMPORTANT - At the end of run() function, call joinAllByTransaction() function:
$this->joinAllByTransaction();
Once done with seeds file edit, run:
$ php artisan migrate:refresh --seed
# This command also rollbacks database and migrates it again.
Features
Table of contents:
- Notes
- Users
- Menu management
- Role management
- Management of the media
- BREAD
- Email Templates
Notes
It is an example of data presentation in a pagination table, and CRUD functionality.
Users
It is a simple example of how to manage registered users.
Menu management
Menu management allows you to toggle the visibility of menu items for individual user roles.
Role management
Allows you to create, edit, delete and reorder user roles.
When a user has more than one role, the highest hierarchical role is used to create a menu for him.
Manage media
It allows to:
- Create virtual media folders.
- Send media to applications.
- Move media between folders,
- Cut images,
BREAD system
BREAD stands for: browse, read, edit, add, delete.
Our BREAD system allows you to easily and quickly generate for any table, from the database, a simple BREAD.
To create a new BREAD just enter a table name from the database. Then enter a name for the form. Enter the number of rows in the browse table. Choose if you want the browse table to contain buttons: “show”, “edit”, “add”, “delete”.
Assign roles for users who will be able to use the ready BREAD.
Then complete each column of the table separately:
- the column name visible to the user,
- the input type for the column,
The last step is to select the appropriate checkboxes: - browse (allows to display the column in the data table),
- read (allows you to display the column in the show view,)
- edit (enables column editing)
- add (allows you to complete the column data when adding a record. Required if the column is not nullable).
It is also possible to handle relationships with another table.
If the column is a foreign key, it should be specified: in the field “Optional relation table name” - table name to which the foreign key refers, in the “Optional column name in relation table - to print” field - the name of the column that is in the relation table to be displayed. Finally, select one of the two “field types” that relate to the relation: ‘relation select’ or ‘relation radio’.
E-mail Templates
It is an example of managing e-mail templates. Allows you to create, edit and delete templates. It also allows you to send an E-mail to a selected address.
Creators
Łukasz Holeczek
CoreUI Team
Community
Get updates on CoreUI’s development and chat with the project maintainers and community members.
- Follow @core_ui on Twitter.
- Read and subscribe to CoreUI Blog.
Community Projects
Some of projects created by community but not maintained by CoreUI team.
CoreUI Icons (522 Free icons) - Premium designed free icon set with marks in SVG, Webfont and raster formats.
CoreUI Icons are beautifully crafted symbols for common actions and items. You can use them in your digital products for web or mobile app. Ready-to-use fonts and stylesheets that work with your favorite frameworks.
![]()
CoreUI Icons Preview & Docs
Copyright and license
copyright 2018 creativeLabs Łukasz Holeczek. Code released under the MIT license.
There is only one limitation you can’t can’t re-distribute the CoreUI as stock. You can’t do this if you modify the CoreUI. In past we faced some problems with persons who tried to sell CoreUI based templates.
Support CoreUI Development
CoreUI is an MIT licensed open source project and completely free to use. However, the amount of effort needed to maintain and develop new features for the project is not sustainable without proper financial backing. You can support development by donating on PayPal, buying CoreUI Pro Version or buying one of our premium admin templates.
As of now I am exploring the possibility of working on CoreUI fulltime - if you are a business that is building core products using CoreUI, I am also open to conversations regarding custom sponsorship / consulting arrangements. Get in touch on Twitter.