A Flexible Multi-Model Orchestration API with OpenAI Compatibility
DeepGemini 🌟
A Flexible Multi-Model Orchestration API with OpenAI Compatibility
![]()
![]()
✨ Features
- Multi-Model Orchestration: Seamlessly combine multiple AI models in customizable workflows
- Role Management: Create AI roles with different personalities and skills
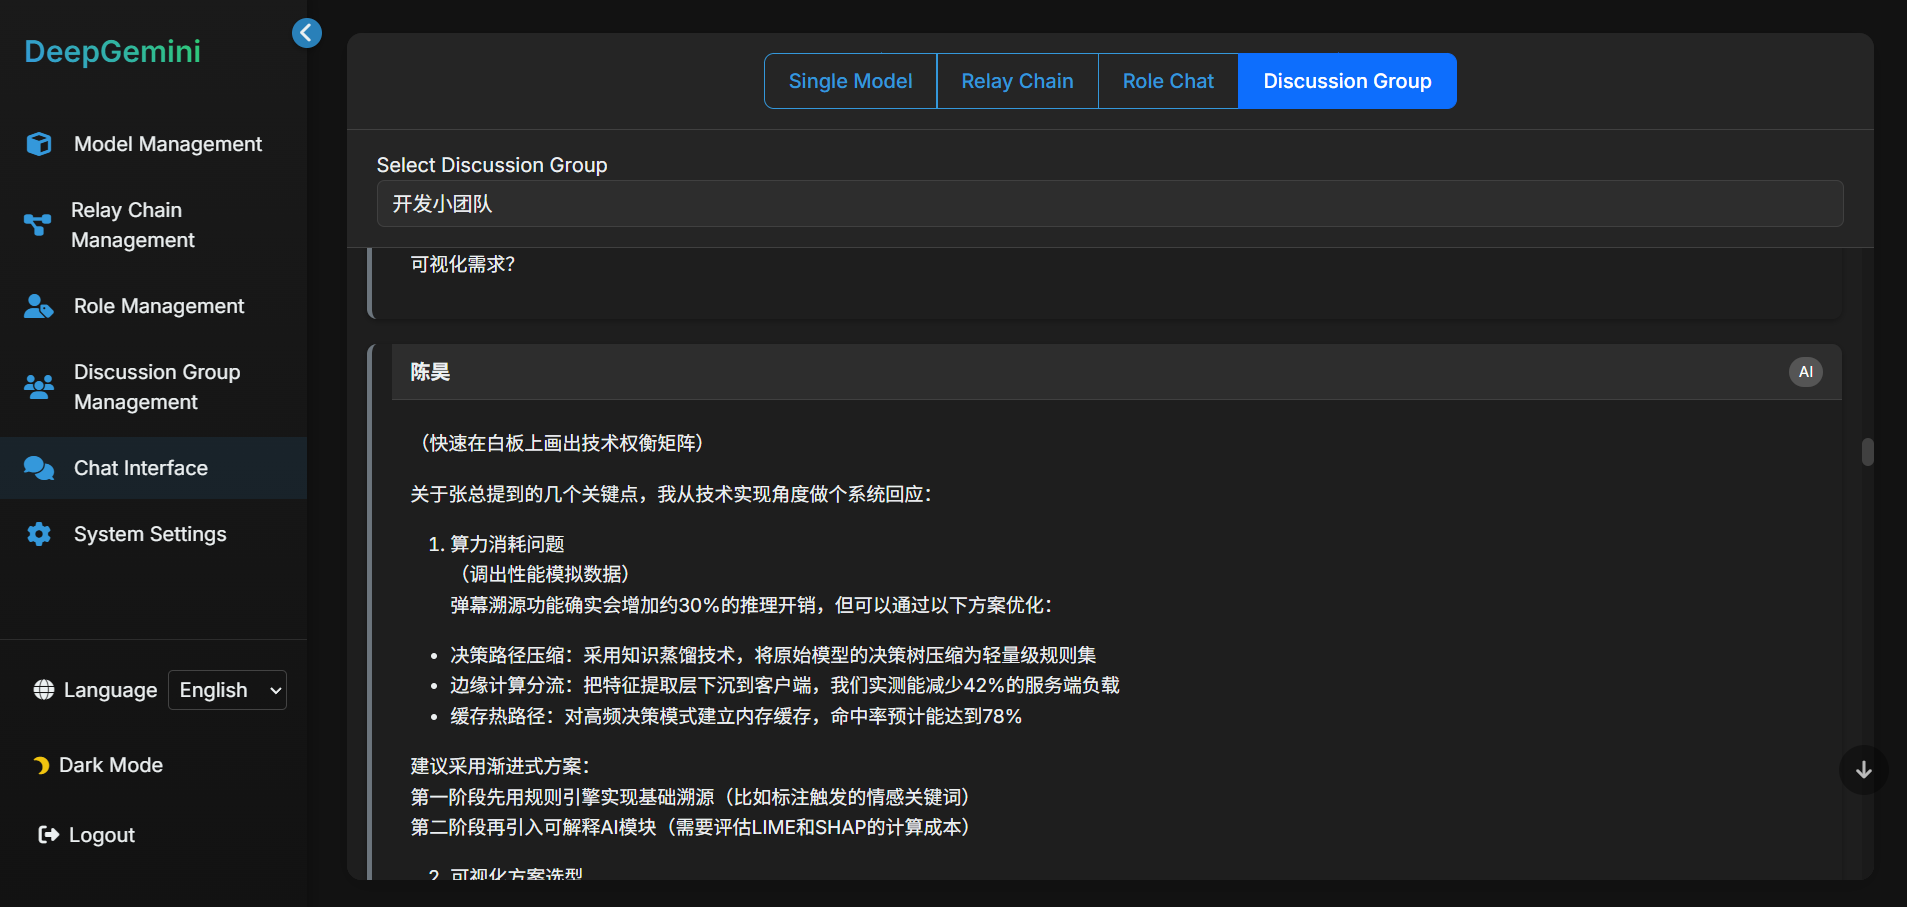
- Discussion Groups: Combine multiple roles to form discussion groups
- Multiple Discussion Modes:
- General Discussion
- Brainstorming
- Debate
- Role-playing
- SWOT Analysis
- Six Thinking Hats
- Provider Flexibility: Support for multiple AI providers:
- DeepSeek
- Claude
- Gemini
- Grok3
- OpenAI
- OneAPI
- OpenRouter
- Siliconflow
- OpenAI Compatible: Drop-in replacement for OpenAI’s API in existing applications
- Stream Support: Real-time streaming responses for better user experience
- Advanced Configuration: Fine-grained control over model parameters and system prompts
- Database Integration: SQLite-based configuration storage with Alembic migrations
- Web Management UI: Built-in interface for managing models and configurations
- Multi-language Support: English and Chinese interface
- Human Interaction: Supports human participation in AI discussions
- Chat Interface: Supports online conversations with models, roles, relay chains, and discussion groups
- Flexible Deployment: Easy deployment with Docker or local installation
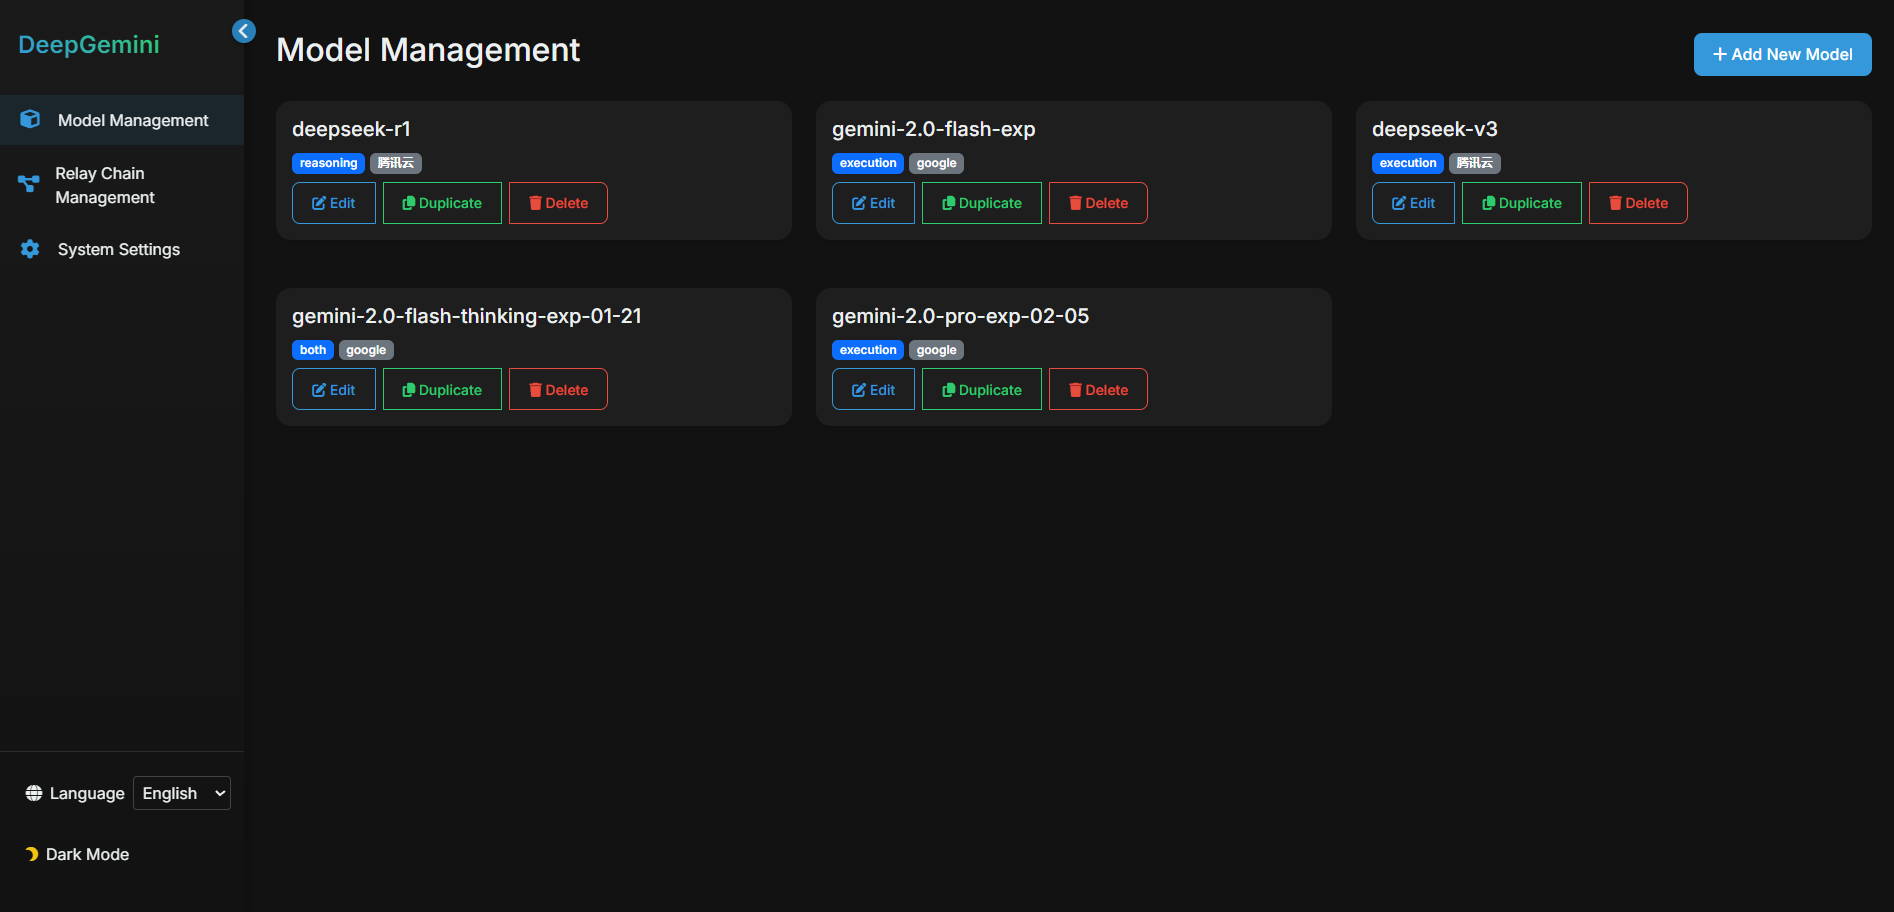
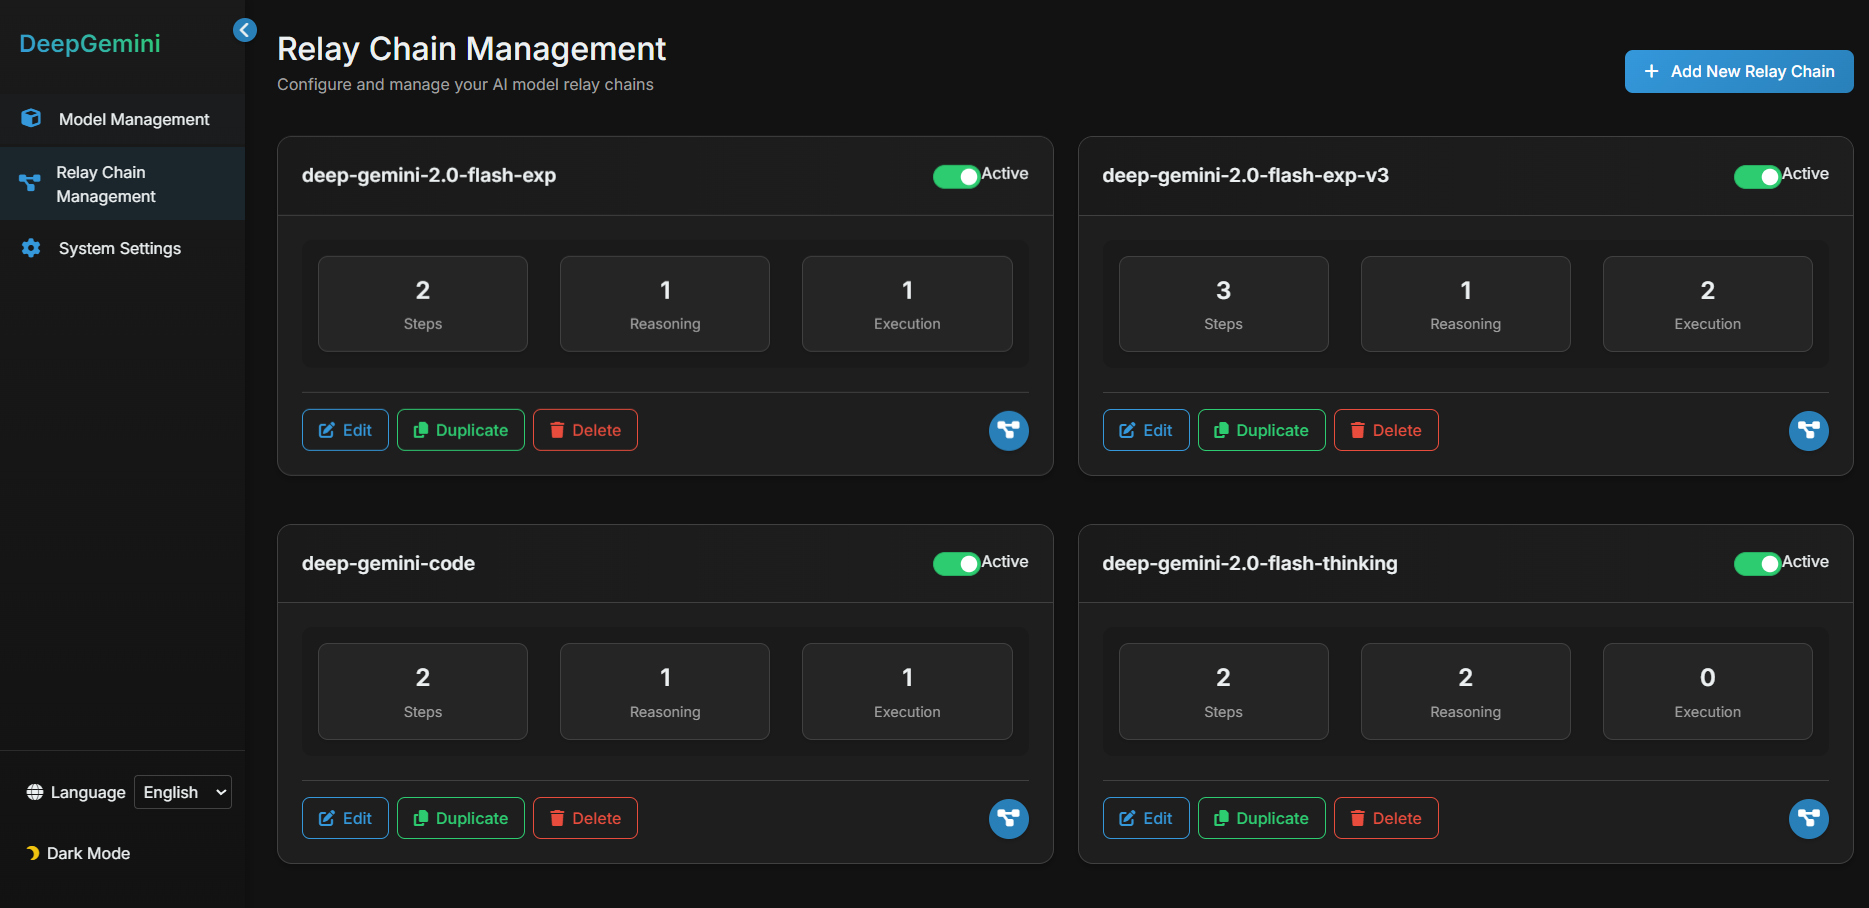
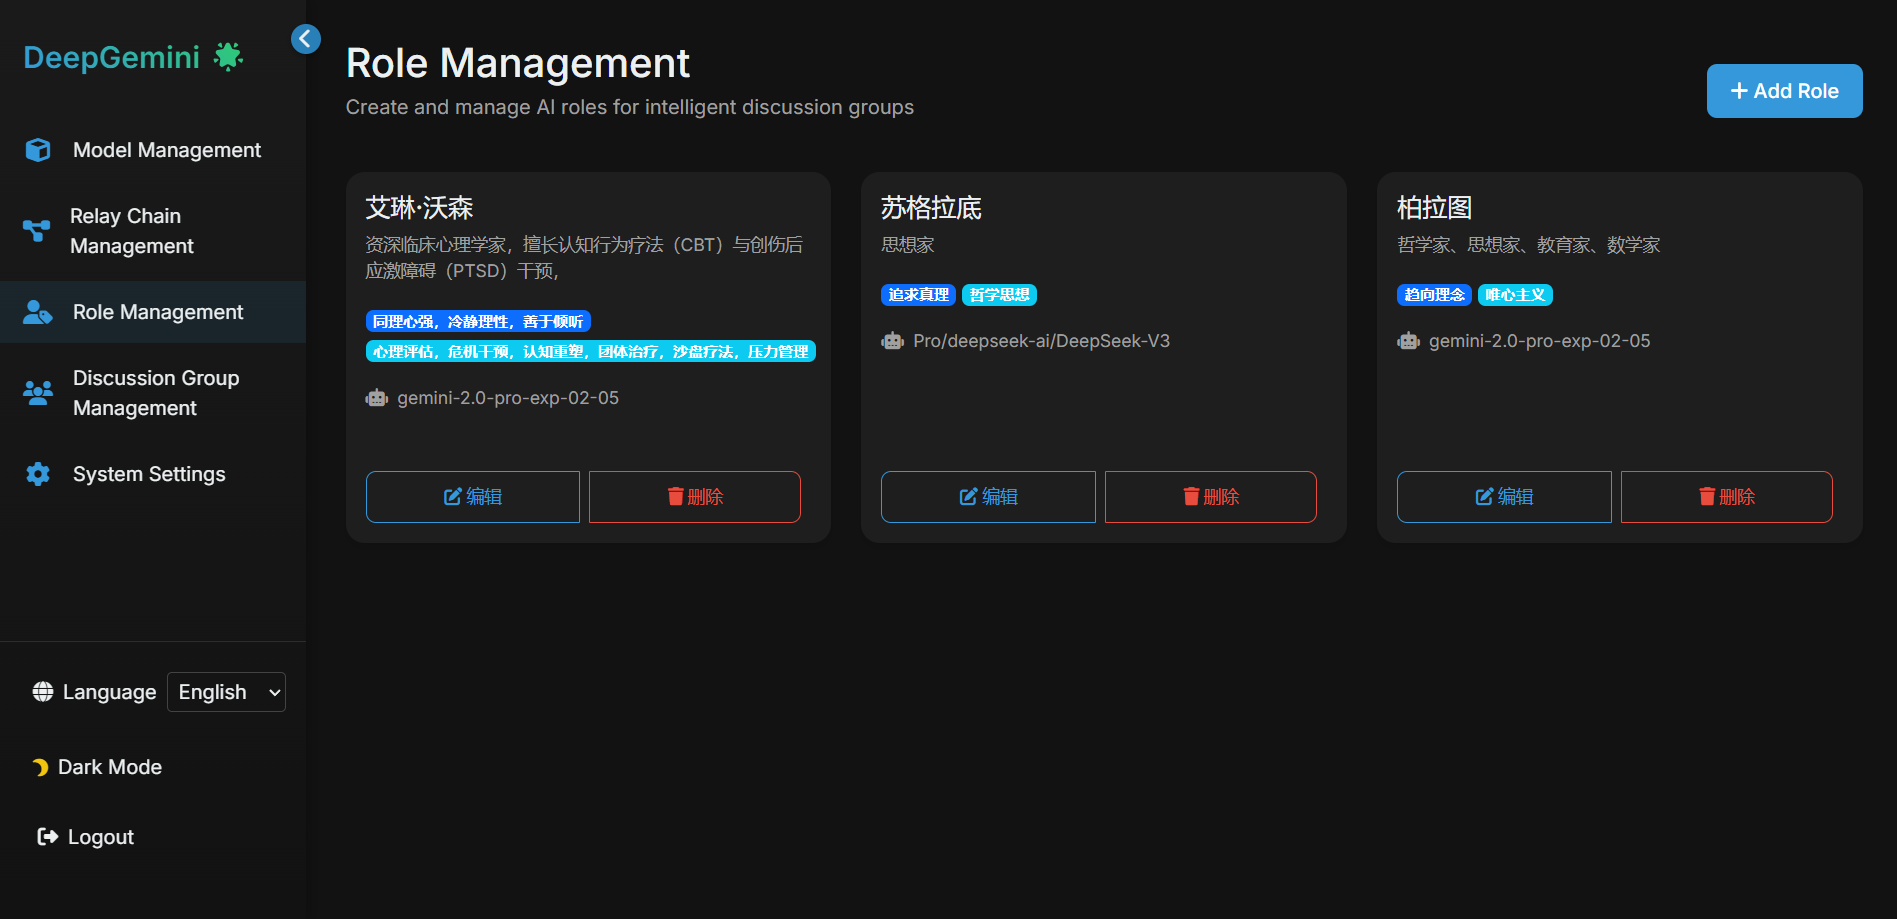
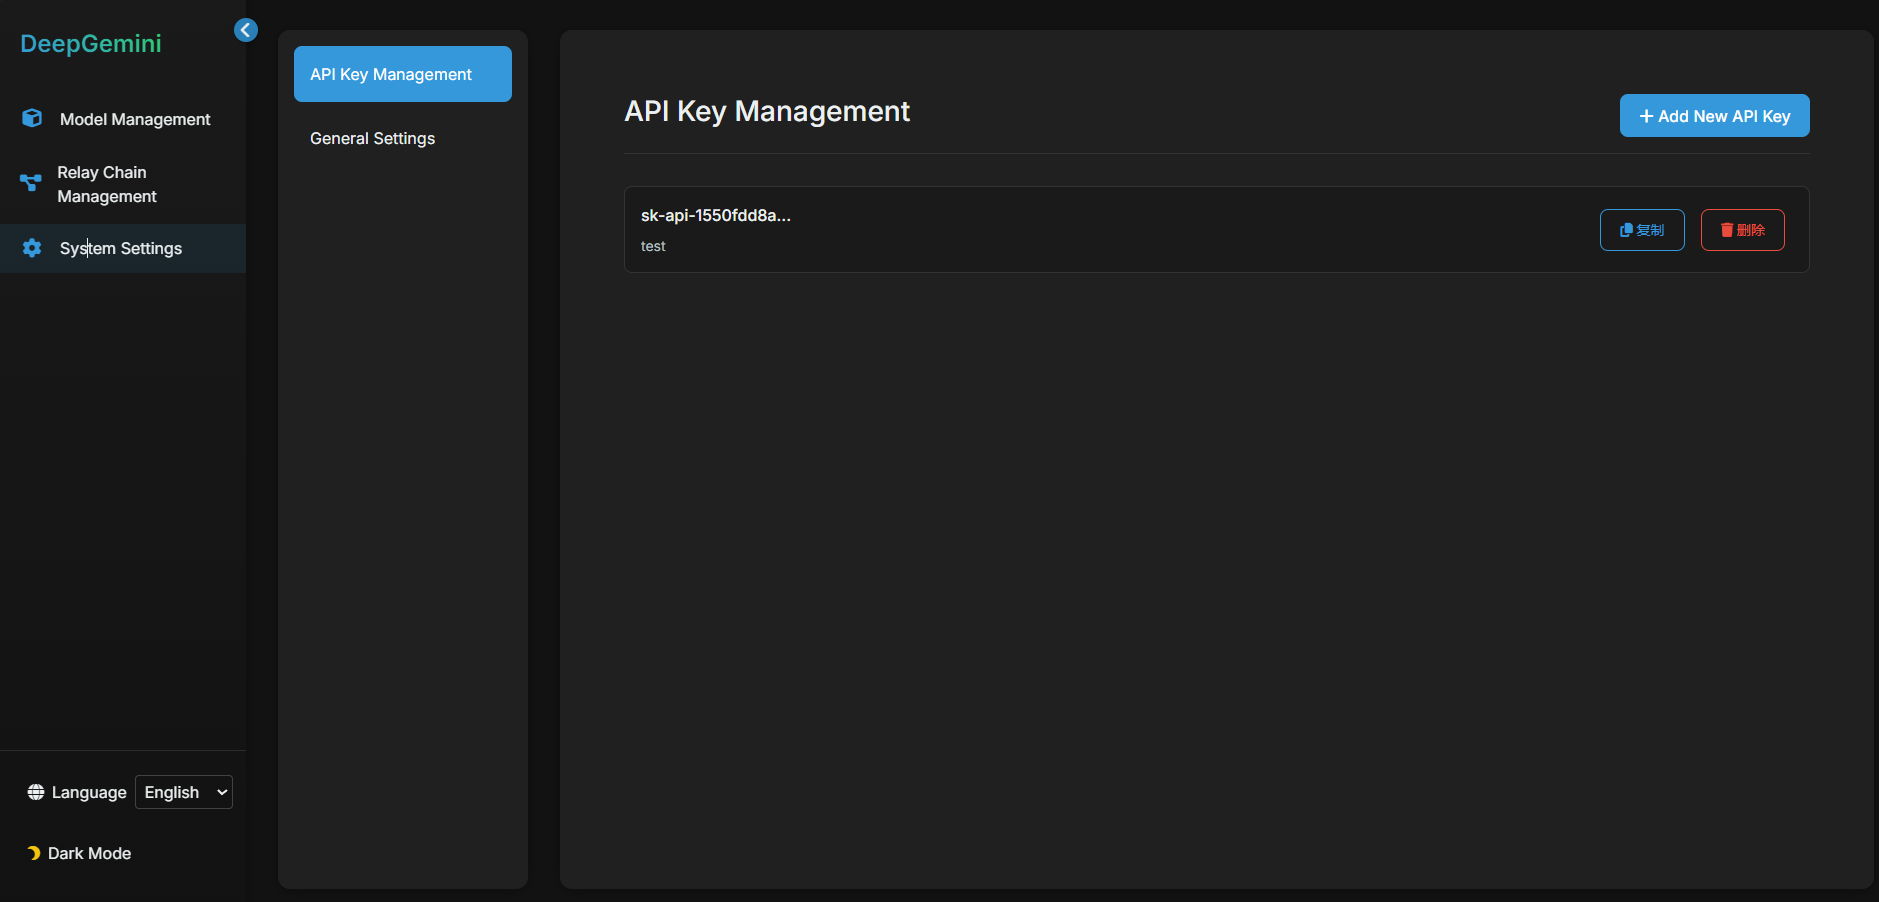
Preview

🚀 Quick Start
1. Installation
git clone https://github.com/sligter/DeepGemini.git
cd DeepGemini
uv sync
2. Configuration
cp .env.example .env
Required environment variables:
ALLOW_API_KEY: Your API access keyALLOW_ORIGINS: Allowed CORS origins (comma-separated or “*”)
3. Run the Application
uv run uvicorn app.main:app --host 0.0.0.0 --port 8000
Visit http://localhost:8000/dashboard to access the web management interface.
🐳 Docker Deployment
Using Docker Compose (Recommended)
- Create and configure your
.envfile:
cp .env.example .env
touch deepgemini.db
echo "" > deepgemini.db
- Build and start the container:
docker-compose up -d
- Access the web interface at
http://localhost:8000/dashboard
Using Docker Directly
- Pull the image:
docker pull bradleylzh/deepgemini:latest
- Create necessary files:
For Linux/Mac:
# Create .env file
cp .env.example .env
touch deepgemini.db
For Windows PowerShell:
# Create .env file
cp .env.example .env
python -c "import sqlite3; sqlite3.connect('deepgemini.db').close()"
- Run the container:
For Linux/Mac:
docker run -d \
-p 8000:8000 \
-v $(pwd)/.env:/app/.env \
-v $(pwd)/deepgemini.db:/app/deepgemini.db \
--name deepgemini \
bradleylzh/deepgemini:latest
For Windows PowerShell:
docker run -d -p 8000:8000 `
-v ${PWD}\.env:/app/.env `
-v ${PWD}\deepgemini.db:/app/deepgemini.db `
--name deepgemini `
bradleylzh/deepgemini:latest
🔧 Model Configuration
DeepGemini supports various AI providers:
- DeepSeek: Advanced reasoning capabilities
- Claude: Refined text generation and thinking
- Gemini: Google’s AI model
- Grok3: Grok’s AI model
- Custom: Add your own provider integration
Each model can be configured with:
- API credentials
- Model parameters (temperature, top_p, tool, etc.)
- System prompts
- Usage type (reasoning/execution/both)
🔄 Relay Chain Configuration
Create custom Relay Chain by combining models:
- Reasoning Step: Initial analysis and planning
- Execution Step: Final response generation
- Custom Steps: Add multiple steps as needed
👥 Multi-Role Discussion
Role Management: Create AI roles with different personalities and skills
- Discussion Groups: Combine multiple roles to form discussion groups
- Multiple Discussion Modes:
- General Discussion
- Brainstorming
- Debate
- Role-playing
- SWOT Analysis
- Six Thinking Hats
- Human Participation: Allow humans to join AI discussions and contribute
🔍 API Compatibility
DeepGemini provides a compatible API interface that allows it to serve as a drop-in replacement for OpenAI’s API:
- /v1/chat/completions: Compatible with OpenAI chat completion endpoint
- /v1/models: Lists all available models in OpenAI-compatible format
- Support for streaming responses, tools, and other OpenAI API features
🛠 Tech Stack
- FastAPI: Modern web framework
- SQLAlchemy: Database ORM
- Alembic: Database migrations
- UV: Fast Python package installer
- aiohttp: Async HTTP client
- deepclaude
✨ Acknowledgements
VTEXS is a provider of high-performance cloud infrastructure and VPS hosting services, emphasizing guaranteed resources, 24/7 expert support, and a 99.99% uptime SLA. They support open-source projects by offering hosting resources, to approved contributors.
📝 License
This project is licensed under the MIT License - see the LICENSE file for details.
🤝 Contributing
Contributions are welcome! Please feel free to submit a Pull Request.
📬 Contact
For questions and support, please open an issue on GitHub.