:wrench: Create macOS VPNs programmatically (L2TP & Cisco)


![]()
![]()

![]()
Create Mac OS VPNs programmatically
This is a command-line tool written in Swift that can create VPN network configurations on your Mac.
It supports L2TP over IPSec and Cisco IPSec.
Integration tests are run as Github Action, to ensure it’s working properly.
This open-source code is actively maintained. Should you like to motivate me, you may click on the ✭ in the top-right corner.
Requirements
macOS 10.10 or higher
Note that the installation via homebrew could fail on previous operating systems, such as High Sierra. In that case, please browse the releases section to find an earlier build for your operating system.
Administrator privileges
I.e. you have to run it with sudo. The passwords of VPN services are exclusively stored in the System Keychain.
Only sudo or a HelperTool can write to the System Keychain.
I don’t want you to have to deal with the complexity a HelperTool can entail, so we simply use sudo.
Installation
If you have Homebrew installed, you can simply start a Terminal and run:
# To see which version is installed via homebrew, have a look at:
# https://github.com/Homebrew/homebrew-core/search?q=macosvpn&type=Issues

brew install macosvpn
If not, you can run this curl command to get the compiled executable from Github:
# Make sure first that the directory /usr/local/bin exists

sudo sh -c "curl -L https://github.com/halo/macosvpn/releases/download/1.0.0/macosvpn > /usr/local/bin/macosvpn"
sudo chmod +x /usr/local/bin/macosvpn
As of macOS Catalina you may once have to “accept” that this executable is considered “safe”:
xattr -d com.apple.quarantine /usr/local/bin/macosvpn
If that freaks you out (it should), you can compile it yourself if you have a recent Xcode version installed:
git clone https://github.com/halo/macosvpn.git
cd macosvpn
bin/build
You can always run macosvpn --version to see the version currently installed on your system
and compare it to the latest available version on Github.
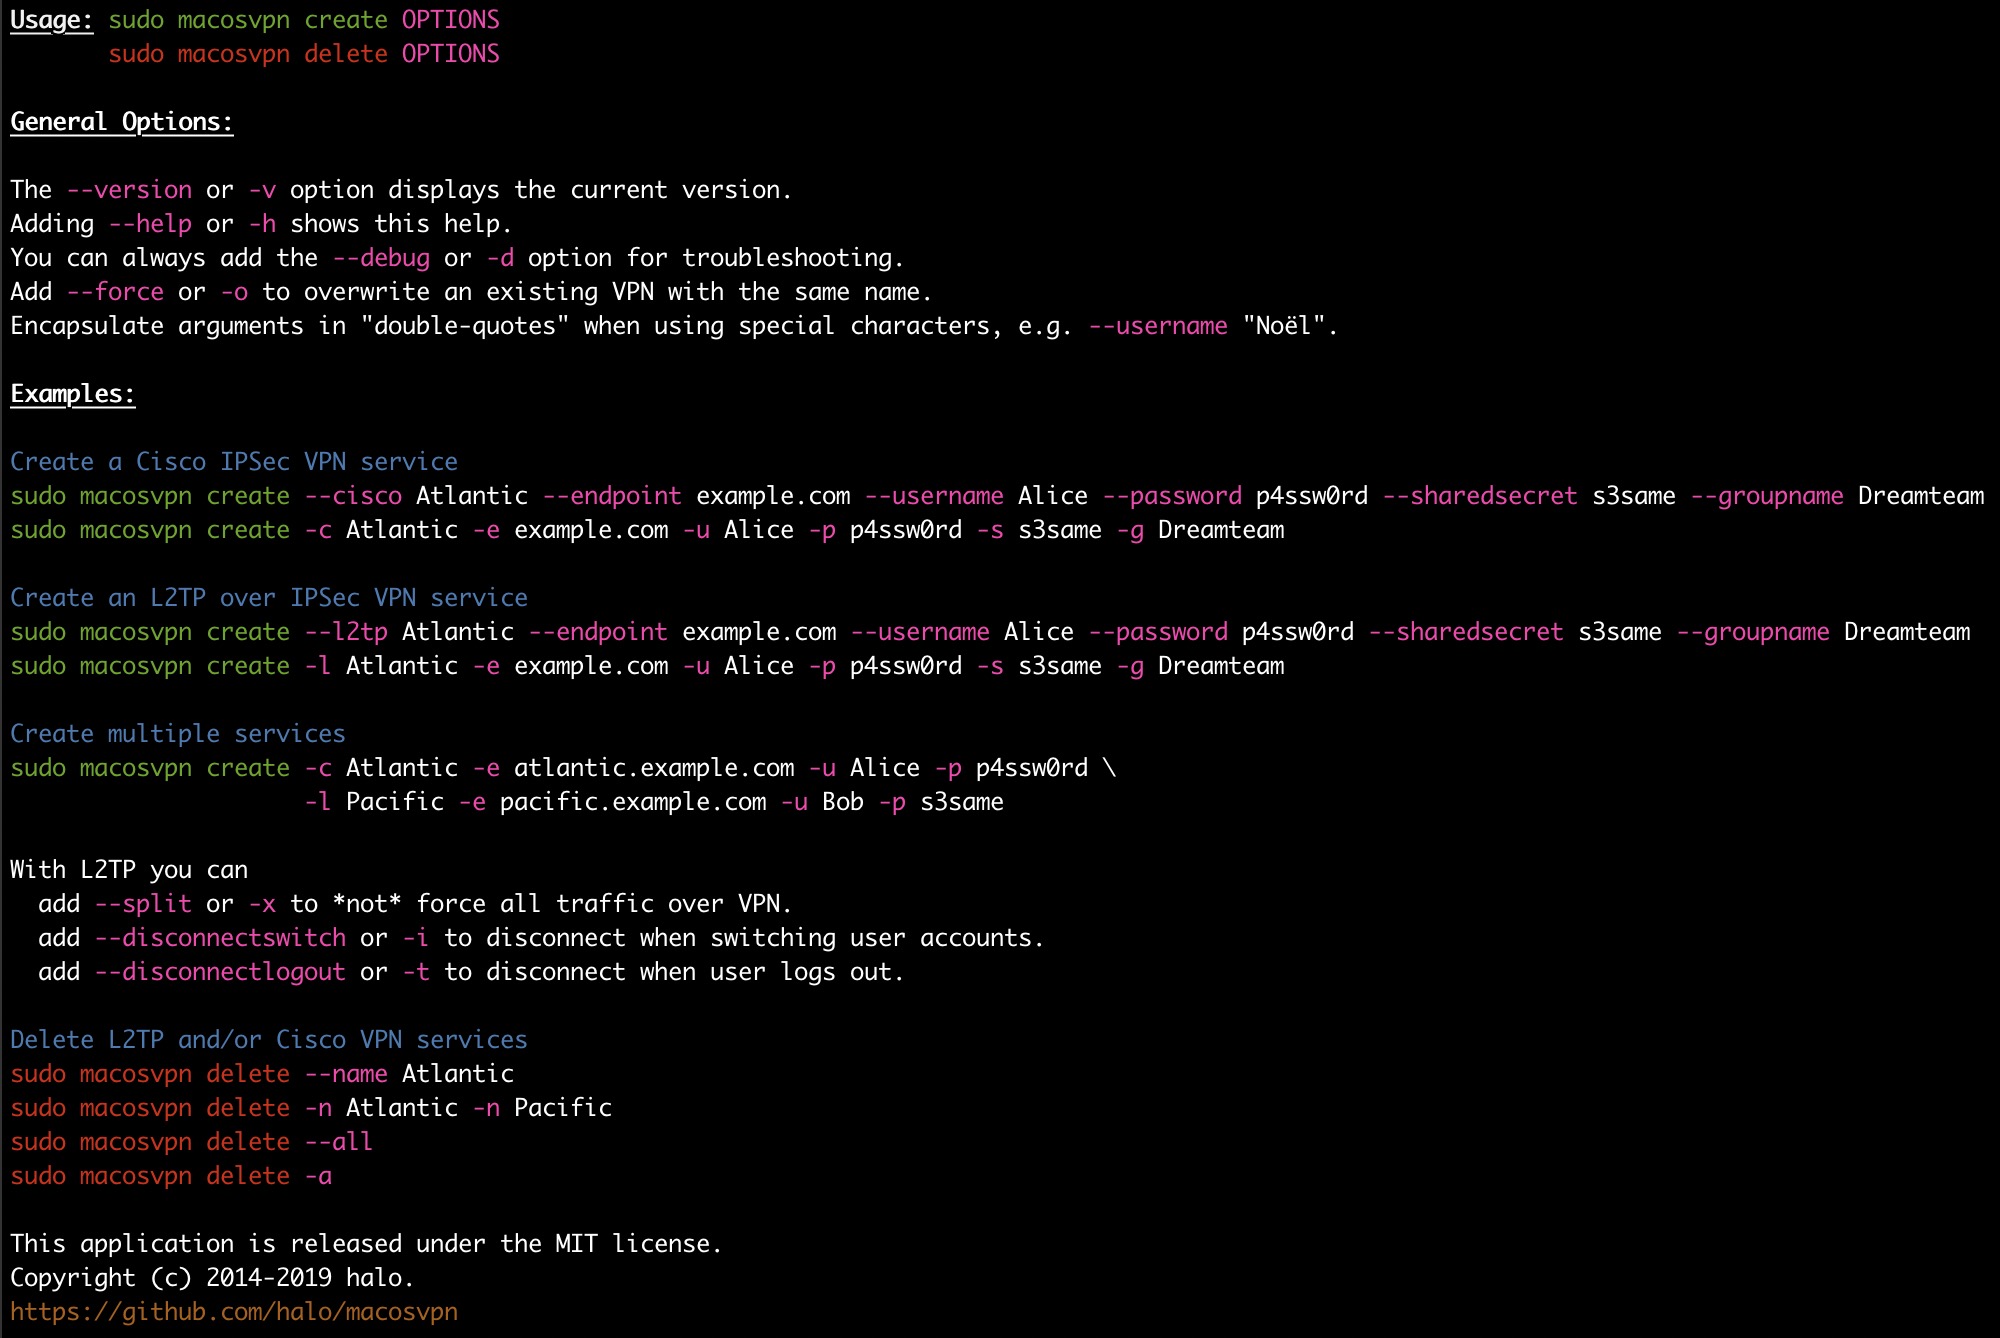
Usage
Creating a single L2TP over IPSec VPN Service:
sudo macosvpn create --l2tp Atlantic --endpoint example.com --username Alice \
                     --password p4ssw0rd --sharedsecret s3same
- Replace
--l2tpwith--ciscoto create a Cisco IPSec instead. - Groupnames can be specified with
--groupname. - Add
--forceto overwrite an existing VPN with the same name.
By default, L2TP is created with the “Send all traffic over VPN connection” option, also known as wildcard routing.
You can add the --split flag to not force all traffic over VPN.
The same command shorter (try out --help to see all available arguments):
sudo macosvpn create -l Atlantic -e example.com -u Alice -p p4ssw0rd -s s3same
With L2TP you can
- add
--splitto not force all traffic over VPN. - add
--disconnectswitchto disconnect when switching user accounts. - add
--disconnectlogoutto disconnect when user logs out.
Creating multiple VPNs at once
Repeat the arguments to create multiple Services at once.
sudo macosvpn create -c Atlantic -e atlantic.example.com -u Alice -p p4ssw0rd \
                     -l Pacific -e pacific.example.com -u Bob -p s3same
Deleting VPN services
sudo macosvpn delete --name MyVPN
sudo macosvpn delete -n AnotherOne -n ThisOneToo
sudo macosvpn delete --all # Careful!
Troubleshooting
- If you’re stuck, try to add the
--debugflag and see if it says something useful.
Limitations
- It is not possible to add so called “configurations” for L2TP. See this issue.
Development
The master branch is always edge and may not be ready for production.
There are XCTest units test and integration tests that are run using ruby. Simply look at bin/test to see how to run the tests on your Mac.
Useful commands for debugging:
# Show all current VPN service configurations
open /Library/Preferences/SystemConfiguration/preferences.plist
# Show all Keychain Items and their access policies
security dump-keychain -a /Library/Keychains/System.keychain
History and credits
Feel free to browse through the code of this application.
It’s pretty small and straight-forward.
It all began with finding this page you probably already found.
But it was not before this practical example that I actually dared to try to implement this.
Then, google led me to this page where I learned how to set the Shared Secret.
The last hurdle was to get the “Send all traffic over VPN” flag, which I finally found the answer to here.
Finally, I learned from over here how to add things to the System Keychain.
Special thanks
Thank you for reporting bugs. And thanks to all keen contributors.
Also thanks to “The Eskimo!”,
whenever I’m deep down in the undocumented macOS VPN stack,
I end up finding random forum posts by this remarkably helpful Apple engineer.
These are 3rd-party libraries, which were kindly released under the MIT license:
- Moderator by Kare Morstol
- PrettyColors by J.D. Healy
License
MIT 2014-2020 halo. See LICENSE.md.