Open Source repository management for deb, rpm, and generic packages
openrepo
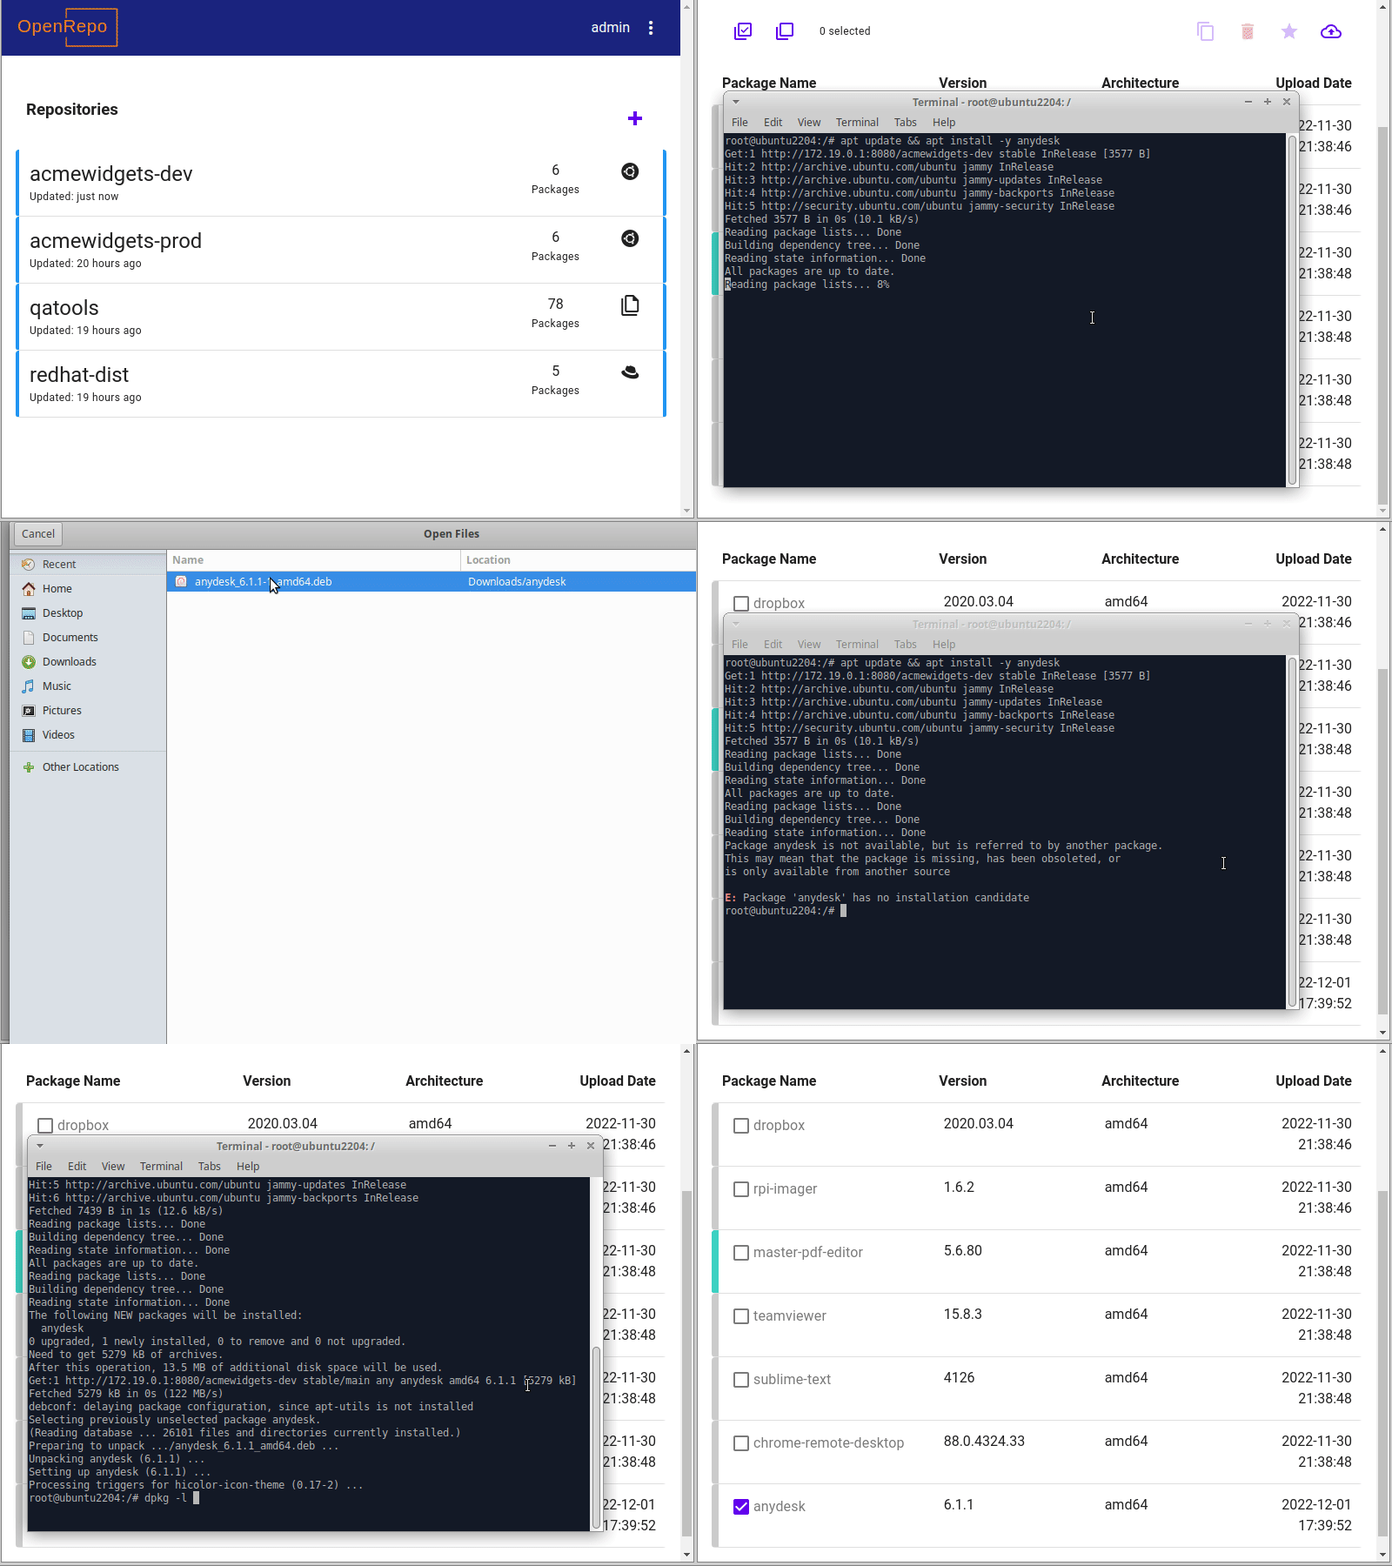
OpenRepo is a web-based server for managing and hosting repositories containing Debian apt/deb, Redhat rpm, and generic package files.
The server supports:
- RPM, Deb, Generic repository generation and hosting compatible with Debian/Ubuntu apt-get and RedHat yum tools
- Package upload, deletion, copying, and promotion (e.g., for easily moving packages through dev, QA, beta, production repos)
- PGP signing key creation and management
- Version management
- User read/write access control for each repo
- REST API
- CLI app to integrate with CI

Getting Started
The preferred method for running OpenRepo is with Docker using the provided docker-compose.yml configuration file. This will run the necessary services
as well as instantiate a PostgreSQL database. All persistent files (i.e., the database, cache data, PGP keys, and the package files) are stored in a relative folder named
openrepo-data.
First ensure that you have installed Docker and the Docker Compose plugin
To start the server:
wget https://raw.githubusercontent.com/openkilt/openrepo/master/docker-compose.yml
docker compose up -d
You can now navigate to the server on http://localhost:7376
The default credentials are:
username: admin
password: admin
If desired, it is possible to point to an alternative PostgreSQL server by updating the “OPENREPO_PG” environment variables in the docker-compose file.
CI Integration
A common requirement is to automatically upload package files produced via Continuous Integration. Please see the OpenRepo Command-Line-Interface documentation for more details.
The CLI program (or REST API) can be used to push new packages to a repo, and can also be used to promote or copy packages to other repos.
Users and Permissions
There are two levels of users:
- Super User - Has read/write access to all repositories as well as administrative access to add/remove users, keys, and permissions
- Regular User - Has read access to all repositories. Write access must be granted explicitly for each repository
Two add a new user:
- As the super user, click on “System Admin” from the menu in the top-right
- Click on the “Add” button next to the Users link
- Add a username and password and click “Save”
- An API key is automatically created. This can be deleted to disallow API access - To enable write access, click on the “Repositories” link, then click the repository where you wish this user to have write access. Add the user to this list and save.
REST API
Repo actions:
Repo UID is created when a new repo is created.
# list names of repos along with IDs
GET /api/repos/

# Show details for a particular repo
GET /api/<repo>/

# Create a new repo
POST /api/repos/

# Delete a repo
DELETE /api/<repo>/
Package actions:
Package UID is created when a new package is uploaded or copied
# List packages for a particular repo
GET /api/<repo>/packages/

# Upload a package to a repo
POST /api/<repo>/upload/

# Delete a package
DELETE /api/<repo>/pkg/<package>/

# Show details for a particular package
GET /api/<repo>/pkg/<package>/

# Copy a package to another repo
POST /api/<repo>/pkg/<package>/copy/
Signing Key actions:
The signing key ID is the fingerprint of the PGP key and is created when the key is uploaded or created
# List all signing keys
GET /api/signingkeys/

# Create a new signing key
POST /api/signingkeys/

# Delete a signing key
DELETE /api/signingkeys/<signingkey>/
Development
Architecture
OpenRepo consists of four running processes:
Nginx web server
The web server hosts the static file content. This includes the “frontend” generated content (Vue/Vuetify) as well as the images and repo files.
The web server also serves as a proxy for the Django endpoints. These are primarily the REST API and the admin interface.
The Nginx web port is the only port that should be exposed to network traffic.
The Django app server
The app server hosts the REST API which is the primary way for the frontend and CLI to interact with the application. There are also a few static pages (e.g., the admin interface, password change forms, etc) that are proxied through to Django.
The Django worker
The worker runs as a background process and communicates exclusively with the database server. The Django worker is responsible for generating metadata when the repos are updated (i.e., packages are uploaded or deleted). This process uses OS tools to create the repos and symlinks the files to their appropriate locations. Some repo generating tools may make use of a cache to store things such as hash information to speed up subsequent repo updates.
The Database
By default OpenRepo uses PostgreSQL. Using other databases are possible (e.g., SQLite to simplify development), however PostgreSQL is recommended for production.
Dev Env Setup
Running the above components individually is the best way to test modifications to the source code.
The first step is to add a file named web/openrepo/settings_local.py and apply any environment variable overrides for development.
For example, the following settings_local.py file will configure your environment to use developer-friendly settings.
import os

os.environ["OPENREPO_VAR_DIR"] = "/var/tmp/openrepo/"
os.environ["OPENREPO_DEBUG"] = "TRUE"
os.environ["OPENREPO_DB_TYPE"] = "sqlite"
os.environ["OPENREPO_LOGLEVEL"] = "DEBUG"
Next, open four separate tabs and run the following commands:
Tab 1: cd web; ./manage.py runserver
Tab 2: cd web; ./manage.py runworker
Tab 3: cd frontend; npm run dev
Tab 4: nginx -c /storage/projects/openrepo/deploy/nginx/nginx.conf.dev
Next, navigate to http://localhost:5173/ to see your code updates. Both the Vue.js dev server and the Django dev server support live updates on code changes.