iOS network debugging, like a wizard 🧙♂️

Start debugging iOS network calls like a wizard, without extra code! Wormholy makes debugging quick and reliable.
Features:
- [x] No code to write and no imports.
- [x] Record all app traffic that uses
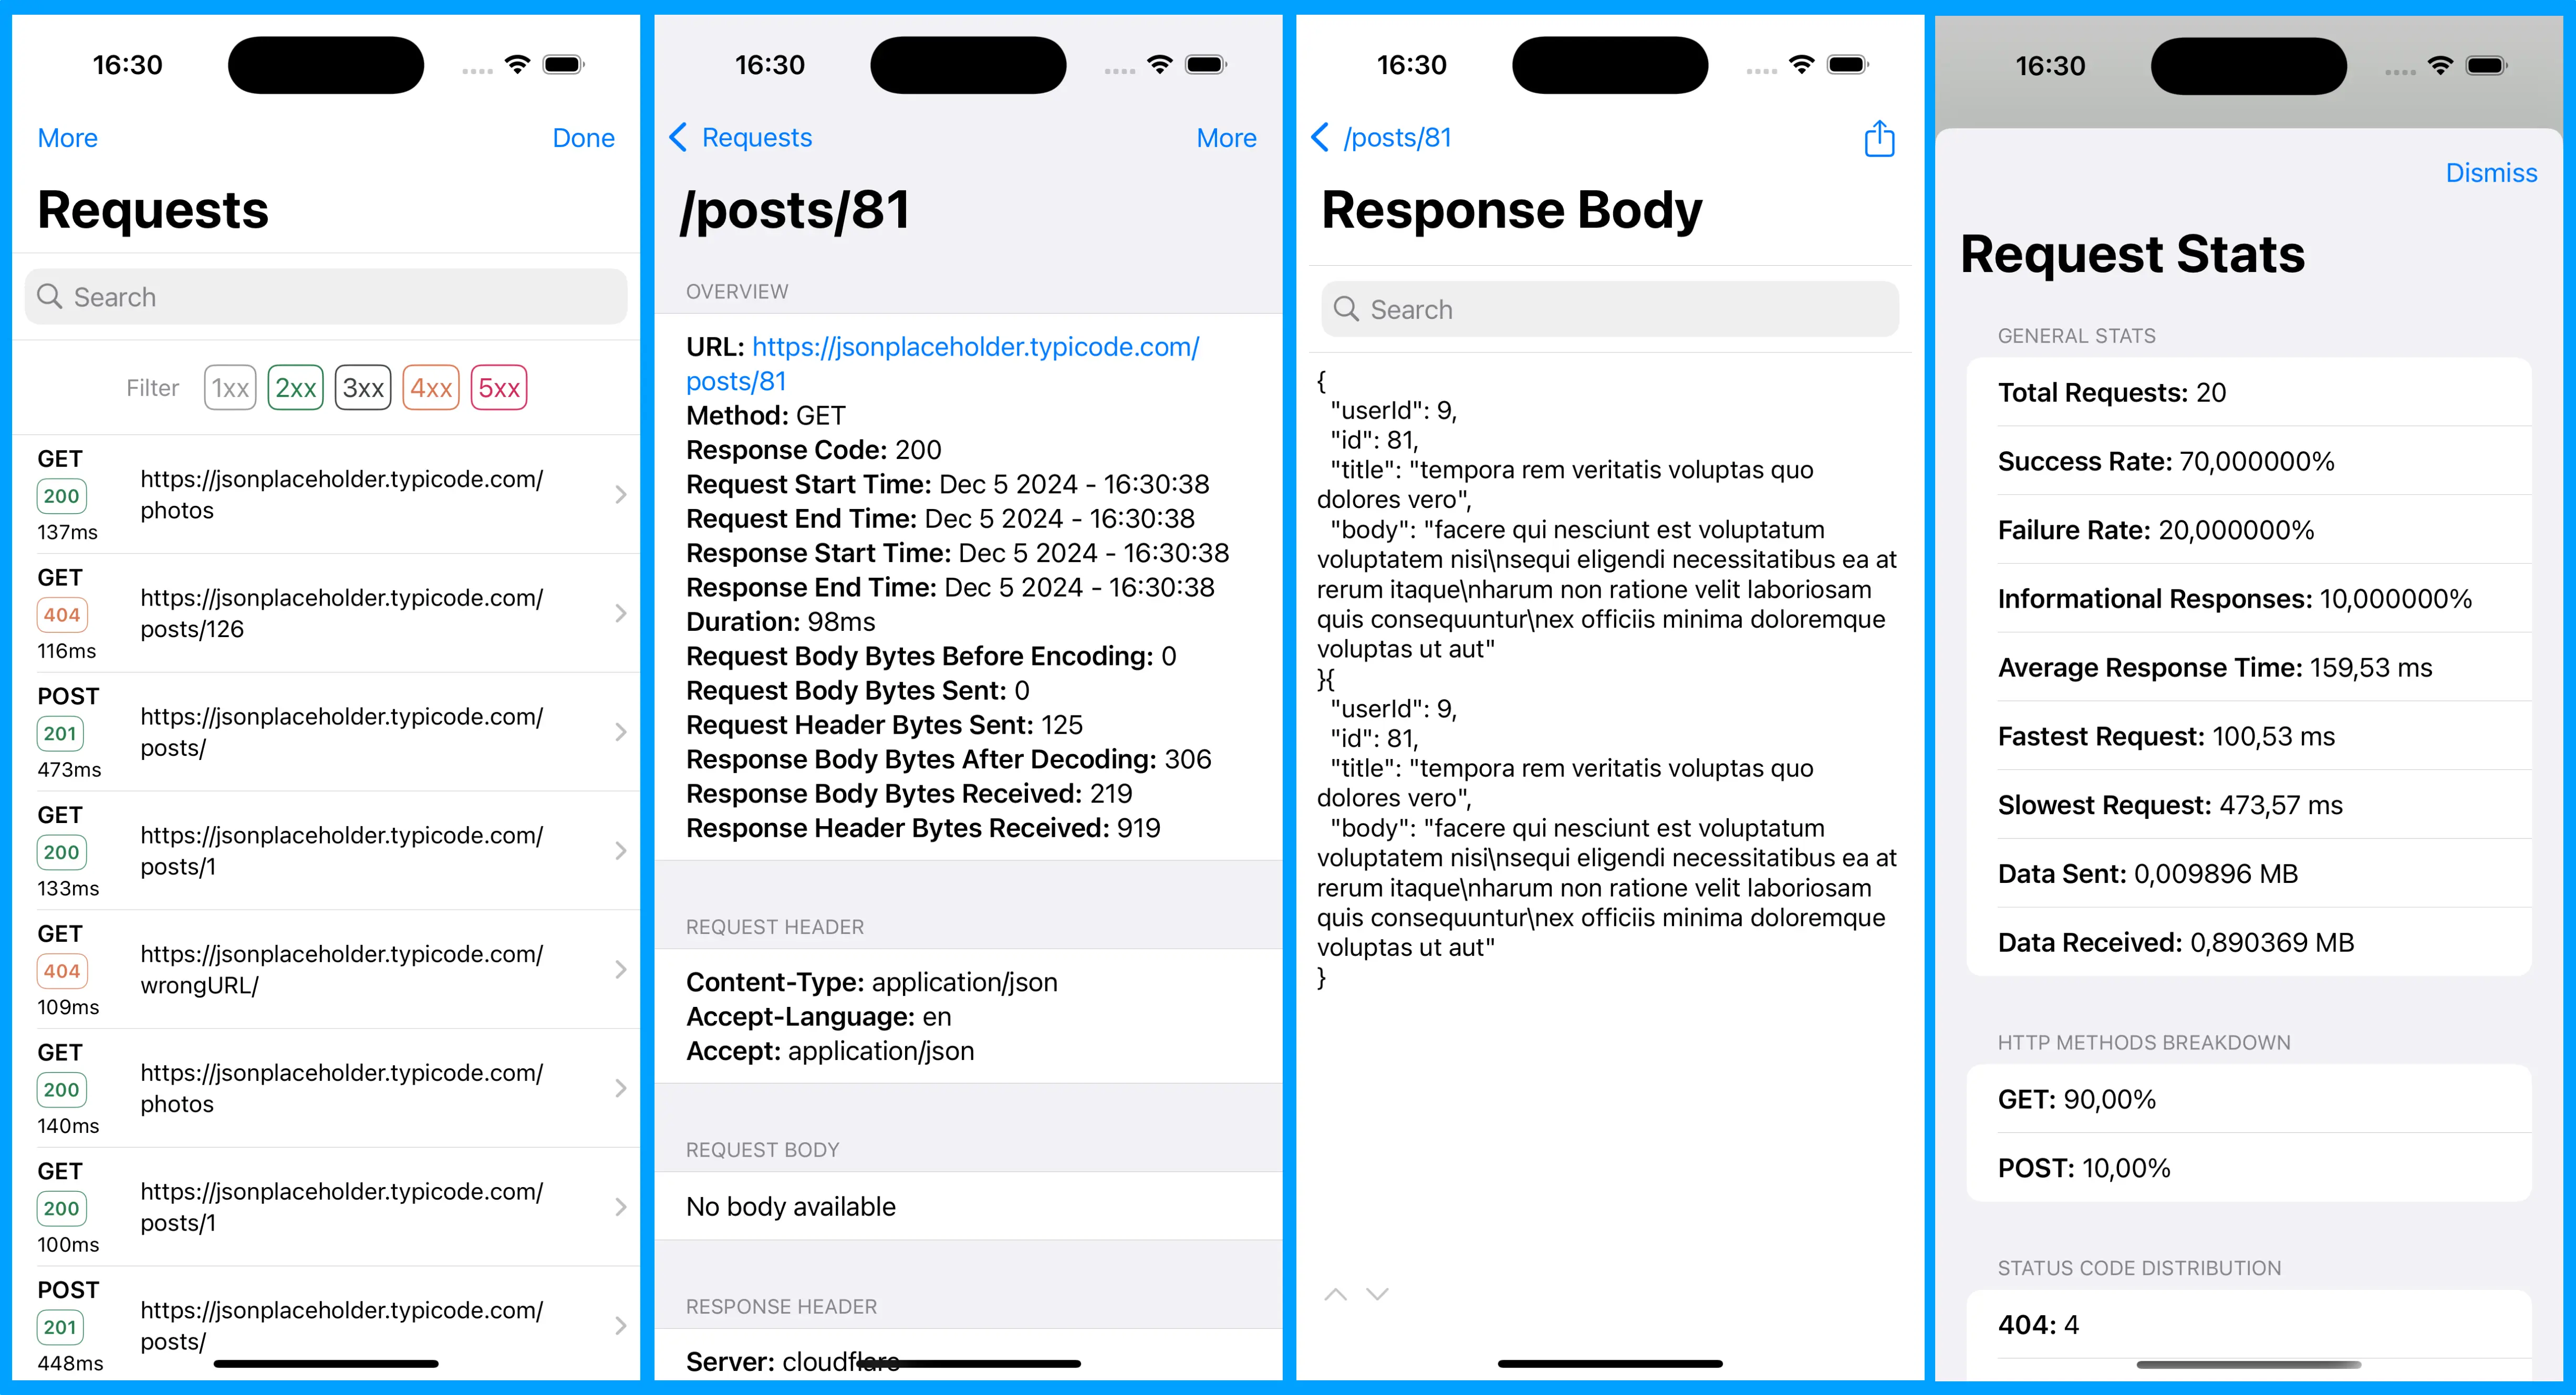
NSURLSession. - [x] Reveal the content of all requests, responses, and headers simply by shaking your phone!
- [x] No headaches with SSL certificates on HTTPS calls.
- [x] Find, isolate, and fix bugs quickly.
- [x] Swift & Objective-C compatibility.
- [x] Also works with external libraries like
Alamofire&AFNetworking. - [x] Ability to blacklist hosts from being recorded using the array
ignoredHosts. - [x] Ability to export API requests as a Postman collection.
- [x] Ability to share cURL representations of API requests.
- [x] Programmatically enable or disable Wormholy for specific session configurations.
- [x] Control the shake gesture activation with the
shakeEnabledproperty. - [x] Filter responses by status code for precise debugging.
- [x] View request stats, including HTTP methods breakdown, status code distribution, error types, response size stats, and more.

Requirements
- iOS 16.0+
- Xcode 15+
- Swift 5
Usage
Integrating Wormholy into your project is simple, and it works like magic! Shake your device or simulator to access Wormholy. There’s no need to import the library into your code.
It is recommended to install it only in debug mode and not integrate it into production. Please remove it before sending your apps to production. The easiest way to do this is with CocoaPods:
pod 'Wormholy', :configurations => ['Debug']
You can also integrate Wormholy using the Swift Package Manager!
Configuration Options
- Ignored Hosts: Specify hosts to be excluded from logging using
Wormholy.ignoredHosts. This is useful for ignoring traffic to certain domains. - Logging Limit: Control the number of logs retained with
Wormholy.limit. This helps manage memory usage by limiting the amount of data stored. - Default Filter: Set a default filter for the search box with
Wormholy.defaultFilterto streamline your debugging process. - Enable/Disable: Use
Wormholy.setEnabled(_:)to toggle request tracking globally. You can also enable or disable it for specificURLSessionConfigurationinstances usingWormholy.setEnabled(_:sessionConfiguration:). - Shake Gesture: Control the activation of Wormholy via shake gesture with
Wormholy.shakeEnabled.
Triggering Wormholy
If you prefer not to use the shake gesture, you can disable it using the environment variable WORMHOLY_SHAKE_ENABLED = NO.
To trigger Wormholy manually from another point in your app without using the shake gesture, call:
NotificationCenter.default.post(name: NSNotification.Name(rawValue: "wormholy_fire"), object: nil)
By following these steps and configurations, you can effectively integrate Wormholy into your development workflow, enhancing your ability to debug network requests efficiently.
Contributing
- If you need help or you’d like to ask a general question, open an issue.
- If you found a bug, open an issue.
- If you have a feature request, open an issue.
- If you want to contribute, submit a pull request.
Acknowledgements
Made with ❤️ by Paolo Musolino.
Follow me on:
🤖 X
MIT License
Wormholy is available under the MIT license. See the LICENSE file for more information.


