An extension for Apple's xcodebuild that makes it easier to test iOS and macOS apps.
xctool
xctool is an extension for Apple’s xcodebuild which makes it
easier to test iOS and Mac products. It’s especially helpful
for continuous integration.

[ Features • Requirements • Usage
• Continuous Integration
• Reporters •
Configuration •
Contributing • Known Issues & Tips • License ]
Features
xctool is drop-in replacement for xcodebuild test that adds a few
extra features:
-
Faster, parallelized test runs.
xctool can optionally run all of your test bundles in parallel,
speeding up your test runs significantly. At Facebook, we’ve seen 2x
and 3x speed ups by parallelizing our runs.Use the
-parallelizeoption with run-tests or test to enable.
See Parallelizing Test Runs for more info. -
Structured output of test results.
xctool captures all test results as structured JSON objects. If
you’re building a continuous integration system, this means you don’t
have to regex parse xcodebuild output anymore.Try one of the Reporters to customize the output or get
the full event stream with the-reporter json-streamoption. -
Human-friendly, ANSI-colored output.
xcodebuild is incredibly verbose, printing the full compile command
and output for every source file. By default, xctool is only verbose
if something goes wrong, making it much easier to identify where the
problems are.Example:
-
Written in Objective-C.
xctool is written in Objective-C. Mac OS X and iOS developers can
easily submit new features and fix any bugs they may encounter without
learning a new language. We very much welcome pull requests!
Note: Support for building projects with xctool is deprecated and will
not be updated to support future versions of Xcode. We suggest moving to
xcodebuild (with xcpretty) for
simple needs, or xcbuild for more
involved requirements. xctool will continue to support testing (see above).
Requirements
- Xcode 7 or higher
- You’ll need Xcode’s Command Line Tools installed. From Xcode, install
via Xcode → Preferences → Downloads.
Installation
xctool can be installed from homebrew via
brew install xctool
or can be downloaded and run via the xctool.sh command.
Usage
xctool’s commands and options are mostly a superset of xcodebuild’s. In
most cases, you can just swap xcodebuild with xctool and things will
run as expected but with more attractive output.
You can always get help and a full list of options with:
path/to/xctool.sh -help
Testing
xctool has a run-tests action which knows how to run the
tests in your scheme. You can optionally limit what tests are run
or change the SDK they’re run against.
To run all tests in your scheme, you would use:
path/to/xctool.sh \
  -workspace YourWorkspace.xcworkspace \
  -scheme YourScheme \
  run-tests
To run just the tests in a specific target, use the -only option:
path/to/xctool.sh \
  -workspace YourWorkspace.xcworkspace \
  -scheme YourScheme \
  run-tests -only SomeTestTarget
You can go further and just run a specific test class:
path/to/xctool.sh \
  -workspace YourWorkspace.xcworkspace \
  -scheme YourScheme \
  run-tests -only SomeTestTarget:SomeTestClass
Or, even further and run just a single test method:
path/to/xctool.sh \
  -workspace YourWorkspace.xcworkspace \
  -scheme YourScheme \
  run-tests -only SomeTestTarget:SomeTestClass/testSomeMethod
You can also specify prefix matching for classes or test methods:
path/to/xctool.sh \
  -workspace YourWorkspace.xcworkspace \
  -scheme YourScheme \
  run-tests -only SomeTestTarget:SomeTestClassPrefix*,SomeTestClass/testSomeMethodPrefix*
Alternatively, you can omit a specific item by prefix matching for classes or test methods:
path/to/xctool.sh \
  -workspace YourWorkspace.xcworkspace \
  -scheme YourScheme \
  run-tests -omit SomeTestTarget:SomeTestClass/testSomeMethodPrefix*
You can also run tests against a different SDK:
path/to/xctool.sh \
  -workspace YourWorkspace.xcworkspace \
  -scheme YourScheme \
  run-tests -test-sdk iphonesimulator5.1
Optionally you can specify -testTimeout when running tests. When an individual
test hits this timeout, it is considered a failure rather than waiting indefinitely.
This can prevent your test run from deadlocking forever due to misbehaving tests.
By default application tests will wait at most 30 seconds for the simulator
to launch. If you need to change this timeout, use the -launch-timeout option.
Building Tests
Before running tests you need to build them. You can use xcodebuild, xcbuild or Buck to do that.
For example:
xcodebuild \
  -workspace YourWorkspace.xcworkspace \
  -scheme YourScheme \
  build-for-testing
Xcode 7
If you are using Xcode 7 for building you can continue using xctool to build tests using
build-tests or just use test actions to run tests.
For example:
path/to/xctool.sh \
  -workspace YourWorkspace.xcworkspace \
  -scheme YourScheme \
  build-tests
You can optionally just build a single test target with the -only option:
path/to/xctool.sh \
  -workspace YourWorkspace.xcworkspace \
  -scheme YourScheme \
  build-tests -only SomeTestTarget
Parallelizing Test Runs
xctool can optionally run unit tests in parallel, making better use of
otherwise idle CPU cores. At Facebook, we’ve seen 2x and 3x gains by
parallelizing our test runs.
To allow test bundles to run concurrently, use the -parallelize
option:
path/to/xctool.sh \
  -workspace YourWorkspace.xcworkspace \
  -scheme YourScheme \
  run-tests -parallelize
The above gives you parallelism, but you’re bounded by your slowest test
bundle. For example, if you had two test bundles (‘A’ and ‘B’), but ‘B’
took 10 times as long to run because it contained 10 times as many
tests, then the above parallelism won’t help much.
You can get further gains by breaking your test execution into buckets
using the -logicTestBucketSize option:
path/to/xctool.sh \
  -workspace YourWorkspace.xcworkspace \
  -scheme YourScheme \
  run-tests -parallelize -logicTestBucketSize 20
The above will break your test execution into buckets of 20 test
cases each, and those bundles will be run concurrently. If some of your
test bundles are much larger than others, this will help even things out
and speed up the overall test run.
Building (Xcode 7 only)
Note: Support for building projects with xctool is deprecated and isn’t
supported in Xcode 8 and later. We suggest moving to xcodebuild (with
xcpretty) for
simple needs, or xcbuild for more
involved requirements. Alternatively, you can use Buck.
Building products with xctool is the same as building them with
xcodebuild.
If you use workspaces and schemes:
path/to/xctool.sh \
  -workspace YourWorkspace.xcworkspace \
  -scheme YourScheme \
  build
If you use projects and schemes:
path/to/xctool.sh \
  -project YourProject.xcodeproj \
  -scheme YourScheme \
  build
All of the common options like -configuration, -sdk, -arch work
just as they do with xcodebuild.
NOTE: xctool doesn’t support directly building targets using
-target; you must use schemes.
Continuous Integration
xctool is an excellent choice for running your tests under a continuous
integration server such as Travis CI or Jenkins.
To run tests within a continuous integration environment,
you must create Shared Schemes for your application target and ensure that all dependencies (such as CocoaPods) are added explicitly to the Scheme. To do so:
- Open up the Manage Schemes sheet by selecting the Product menu > Schemes > Manage Schemes…
- Locate your application target in the list. Ensure that the Shared checkbox in far right hand column of the sheet is checked.
- If your application or test targets include cross-project dependencies such as CocoaPods, then you will need to ensure that they have been
configured as explicit dependencies. To do so:- Highlight your application target and hit the Edit… button to open the Scheme editing sheet.
- Click the Build tab in the left-hand panel of the Scheme editor.
- Click the + button and add each dependency to the project. CocoaPods will appear as a static library named Pods.
- Drag the dependency above your application target so that it is built first.
You will now have a new file in the xcshareddata/xcschemes directory underneath your Xcode project. This is the
shared Scheme that you just configured. Check this file into your repository and xctool will be able to find and execute
your tests on the next CI build.
Example Travis CI Configuration
Travis CI is a very popular continuous
integration system offered for free to Open Source projects. It
integrates well with Github, and it now uses xctool as the default
build and test tool for Objective-C projects. Once you have set up your
shared Scheme for use with xctool, you will need to configure a
.travis.yml file.
If you’re using workspaces, your .travis.yml might be:
language: objective-c
xcode_workspace: path/to/YourApp.xcworkspace
xcode_scheme: YourApp
If you’re using projects, your .travis.yml might be:
language: objective-c
xcode_project: path/to/YourApp.xcodeproj
xcode_scheme: YourApp
For more flexibility, you can also control how Travis installs and
invokes xctool:
language: objective-c
before_install:
    - brew update
    - brew install xctool
script: xctool -workspace MyApp.xcworkspace -scheme MyApp test
You can learn more about the Travis CI environment for iOS and OS X
application by referring to the About OS X Travis CI
Environment
document and find in-depth documentation for configuring your project by
consulting the Getting
Started page.
Reporters
xctool has reporters that output build and test results in different
formats. If you do not specify any reporters yourself, xctool uses
the pretty and user-notifications reporters by default. xctool also
has these special rules:
- Overwrite is disabled on the
prettyreporter when xctool does not
detect a TTY. This can be overridden by settingXCTOOL_FORCE_TTYin
the environment. - The
user-notificationsreporter will not be used
if xctool detects that the build is being run by Travis CI, CircleCI, TeamCity,
or Jenkins (i.e.TRAVIS=true,CIRCLECI=true,TEAMCITY_VERSION, or
JENKINS_URLin the environment).
You can choose your own reporters with the -reporter option:
path/to/xctool.sh \
  -workspace YourWorkspace.xcworkspace \
  -scheme YourScheme \
  -reporter plain \
  build
By default, reporters output to standard out, but you can also direct
the output to a file by adding :OUTPUT_PATH after the reporter name:
path/to/xctool.sh \
  -workspace YourWorkspace.xcworkspace \
  -scheme YourScheme \
  -reporter plain:/path/to/plain-output.txt \
  build
You can use as many reporters as you like; just use the -reporter
option multiple times.
Included Reporters
- pretty: a text-based reporter that uses ANSI colors and unicode
symbols for pretty output (the default). - plain: like pretty, but with no colors or unicode.
- phabricator: outputs a JSON array of build/test results which can
be fed into the Phabricator code-review tool. - junit: produces a JUnit/xUnit compatible XML file with test
results. - json-stream: a stream of build/test events as JSON dictionaries,
one per line (example
output). - json-compilation-database: outputs a JSON Compilation Database of build events which can be used by Clang Tooling based tools, e.g. OCLint.
- user-notifications: sends notification to Notification Center when action is completed (example notifications).
- teamcity: sends service messages to TeamCity Continuous Integration Server
Implementing Your Own Reporters
You can also implement your own reporters using whatever language you
like. Reporters in xctool are separate executables that read JSON
objects from STDIN and write formatted results to STDOUT.
You can invoke reporters by passing their full path via the -reporter
option:
path/to/xctool.sh \
  -workspace YourWorkspace.xcworkspace \
  -scheme YourScheme \
  -reporter /path/to/your/reporter \
  test
For example, here’s a simple reporter in Python that outputs a period
for every passing test and an exclamation mark for every failing test:
#!/usr/bin/python

import fileinput
import json
import sys

for line in fileinput.input():
    obj = json.loads(line)

    if obj['event'] == 'end-test':
        if obj['succeeded']:
            sys.stdout.write('.')
        else:
            sys.stdout.write('!')

sys.stdout.write('\n')
If you’re writing a reporter in Objective-C, you’ll find the
Reporter class helpful - see Reporter.h.
Configuration (.xctool-args)
If you routinely need to pass many arguments to xctool on the
command-line, you can use an .xctool-args file to speed up your workflow.
If xctool finds an .xctool-args file in the current directory, it
will automatically pre-populate its arguments from there.
The format is just a JSON array of arguments:
[
"-workspace", "YourWorkspace.xcworkspace",
"-scheme", "YourScheme",
"-configuration", "Debug",
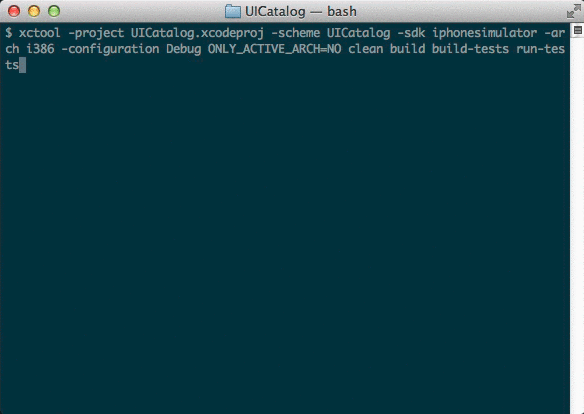
"-sdk", "iphonesimulator",
"-arch", "i386"
]
Any extra arguments you pass on the command-line will take precedence
over those in the .xctool-args file.
Contributing
Bug fixes, improvements, and especially new
Reporter
implementations are welcome. Before submitting a pull
request, please
be sure to sign the Facebook
Contributor License
Agreement. We can’t
accept pull requests unless it’s been signed.
Workflow
- Fork.
- Make a feature branch: git checkout -b my-feature
- Make your feature. Keep things tidy so you have one commit per self-contained change (squashing can help).
- Push your branch to your fork: git push -u origin my-feature
- Open GitHub, under “Your recently pushed branches”, click Pull
Request for my-feature.
Be sure to use a separate feature branch and pull request for every
self-contained feature. If you need to make changes from feedback, make
the changes in place rather than layering on commits (use interactive
rebase to edit your earlier commits). Then use git push --force
origin my-feature to update your pull request.
Workflow (for Facebook people, other committers)
Mostly the same, but use branches in the main xctool repo if you prefer.
It’s a nice way to keep things together.
- Make a feature branch: git checkout -b myusername/my-feature
- Push your branch: git push -u origin myusername/my-feature
- Open GitHub to facebook/xctool,
under “Your recently pushed branches”, click Pull Request for
myusername/my-feature.
Known Issues & Tips
-
Use shared schemes and disable the Autocreate Schemes feature.
Xcode has two kinds of schemes: shared, and user. User schemes are
the default, and they’re stored under a folder calledUSERNAME.xcuserdatad,
which most people correctly add to their .gitignore.Use shared schemes instead, and commit them to your repo. This way
everyone on your team (and your build server) are working from the
same information, and are building in the same way.
-
Make sure simulators run in a GUI context.
If you are running
xctoolin continuous integration, the user account
callingxctoolmust have an active GUI context.
If not, the simulator will fail to start with cryptic warnings like:Tried to install the test host app 'com.myapp.test' but failed. Preparing test environment failed. -[TEST_BUNDLE FAILED_TO_START] There was a problem starting the test bundle: Simulator 'iPhone 6' was not prepared: Failed for unknown reason. Test did not run: Simulator 'iPhone 6' was not prepared: Failed for unknown reason. 2015-01-21 12:02:19.296 xcodebuild[35135:875297] iPhoneSimulator: Timed out waiting 120 seconds for simulator to boot, current state is 1. Testing failed: Test target MyProjectTests encountered an error (Timed out waiting 120 seconds for simulator to boot, current state is 1.Note that the
same holds true withxcodebuild…this is notxctoolspecific.For more information, see this post by Jason Jarrett.
License
Copyright 2014-present Facebook
Licensed under the Apache License, Version 2.0 (the “License”); you may
not use this work except in compliance with the License. You may obtain
a copy of the License in the LICENSE file, or at:
http://www.apache.org/licenses/LICENSE-2.0
Unless required by applicable law or agreed to in writing, software
distributed under the License is distributed on an “AS IS” BASIS,
WITHOUT WARRANTIES OR CONDITIONS OF ANY KIND, either express or implied.
See the License for the specific language governing permissions and
limitations under the License.